Requirements
# |
Recommended |
| Server | VPS, Cloud, or Dedicated (Get 20€ Free Cloud Server Credits) |
| Linux OS | Debian 10 / Ubuntu 20.04 |
| Web Panel | Plesk |
| Web Server | Apache 2.4 |
| Web Server Mods | mod_rewrite (URL rewriting) |
| PHP | 7.4, 8.1+ |
| PHP Extensions | ionCube Loader, cURL, fileinfo, redis |
| PHP Functions enabled | putenv, exec, chown, pcntl_signal, pcntl_alarm, popen, proc_open, dl, apache_setenv |
| Database | MySQL 8 / MariaDB 10.7 |
| Conversion Software | FFmpeg & FFprobe static build |
| Processes Control | Supervisor |
| In-Memory Database / Cache | Redis |
Recommended installation
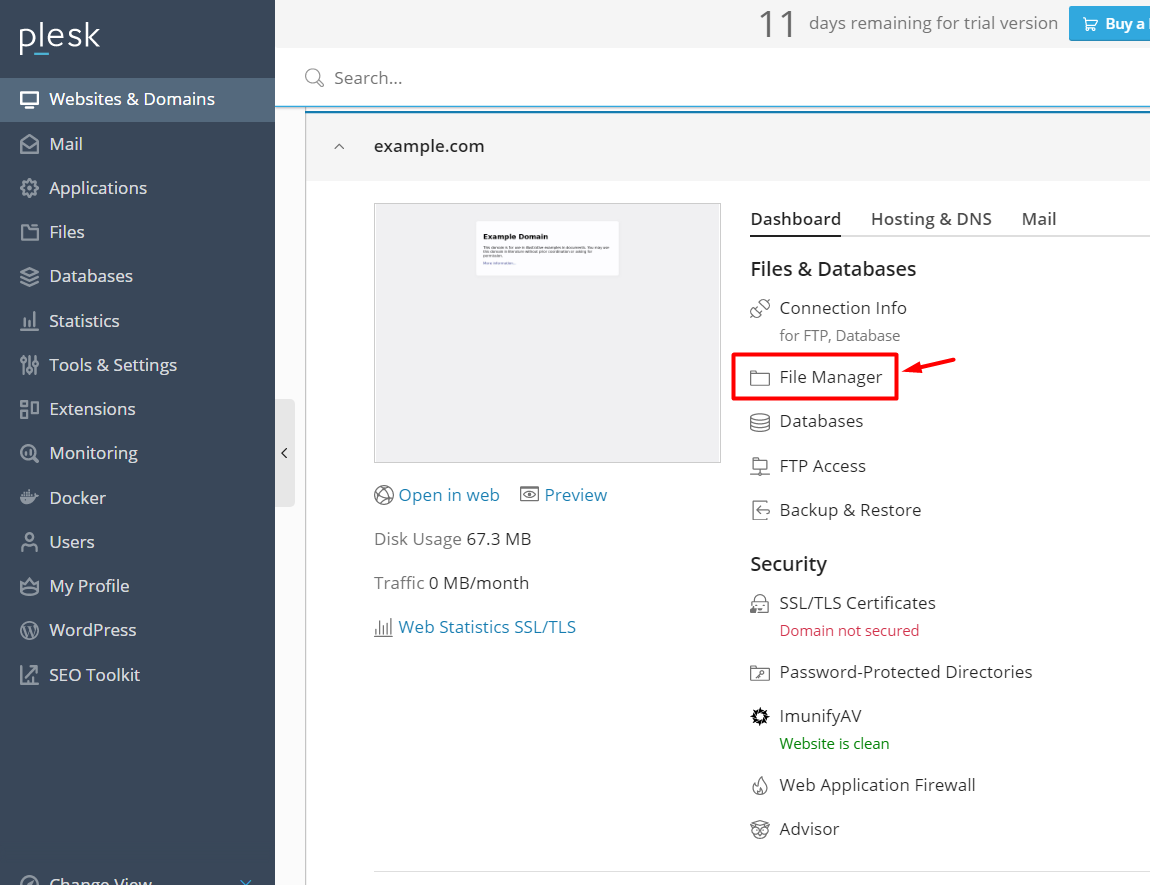
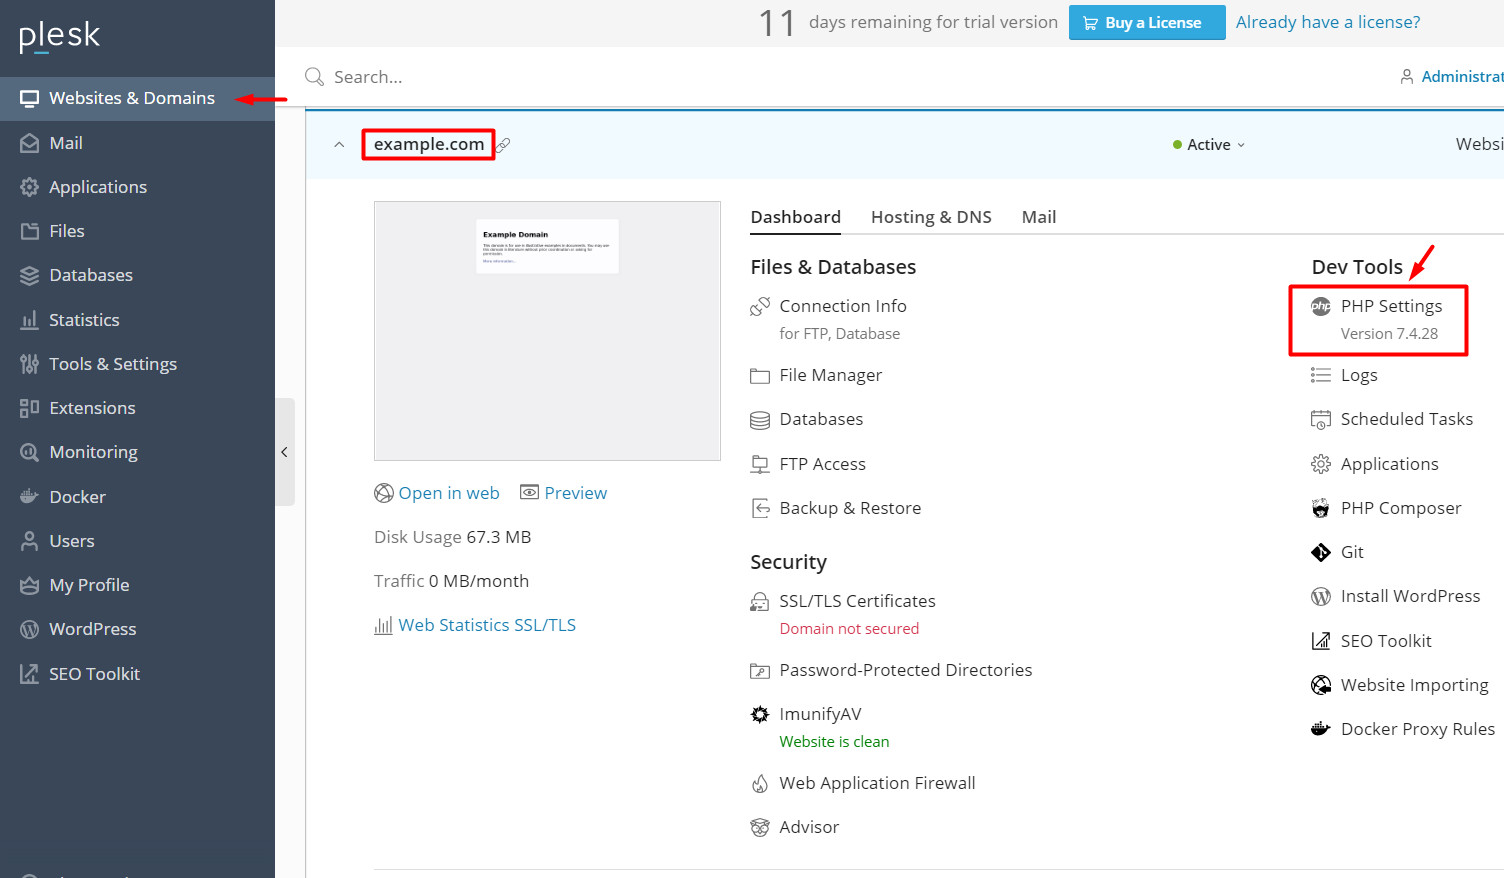
1) In Plesk, click on Websites & Domains > example.com > File Manager
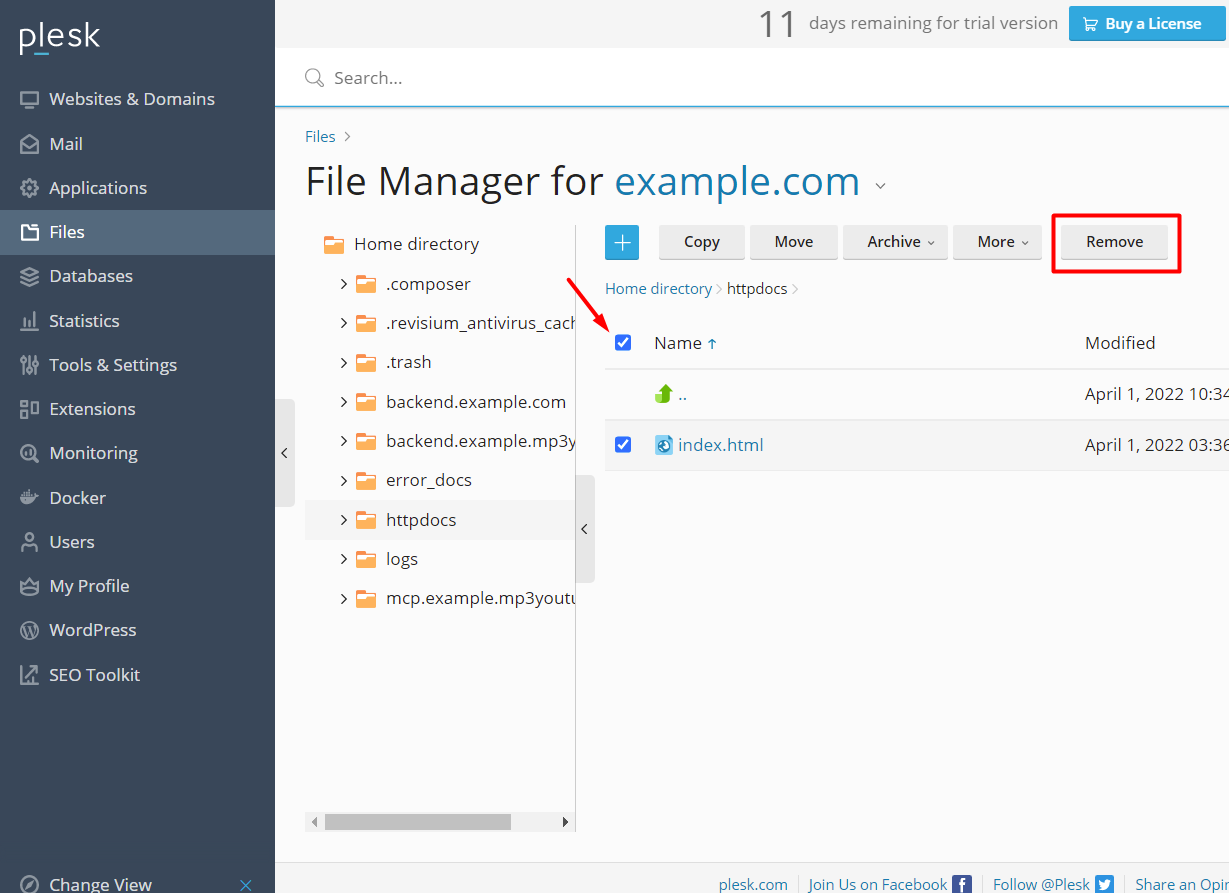
2) Delete all automatically created files
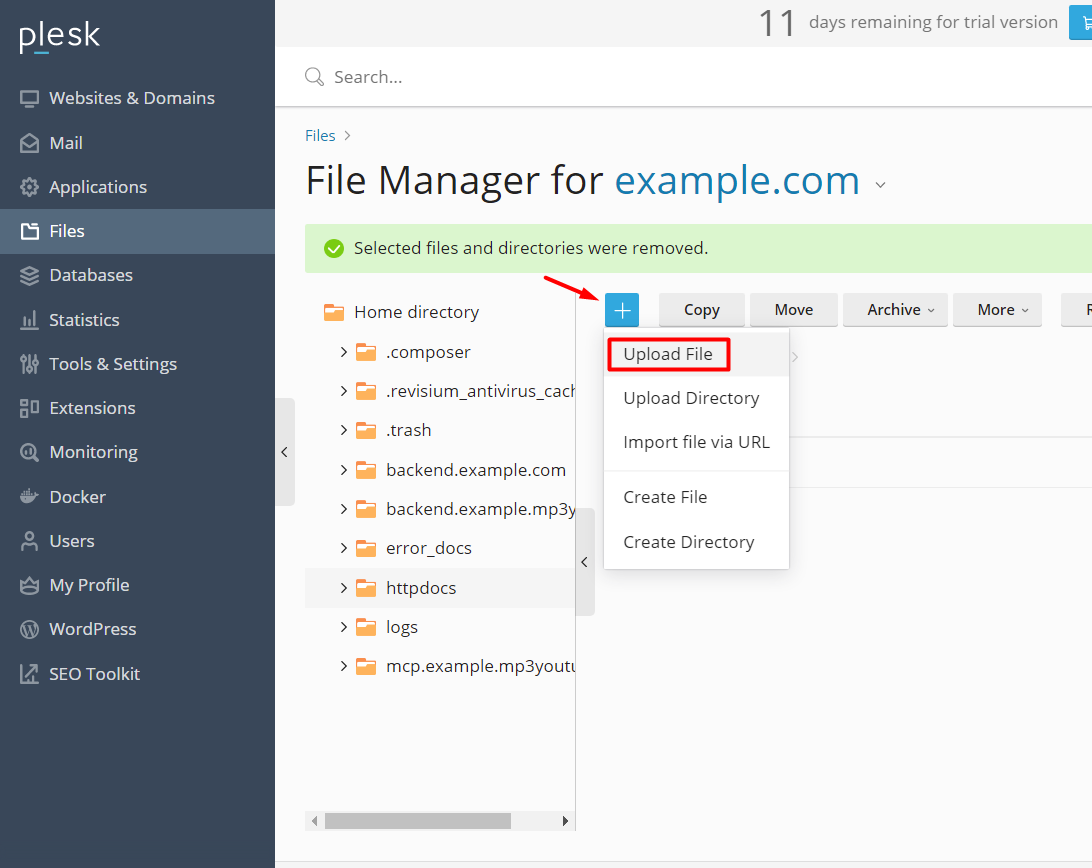
3) Click the blue, square button with the plus sign, select Upload File in the subsequent menu, and upload the "MP3ConverterPro-v3.zip" distribution file
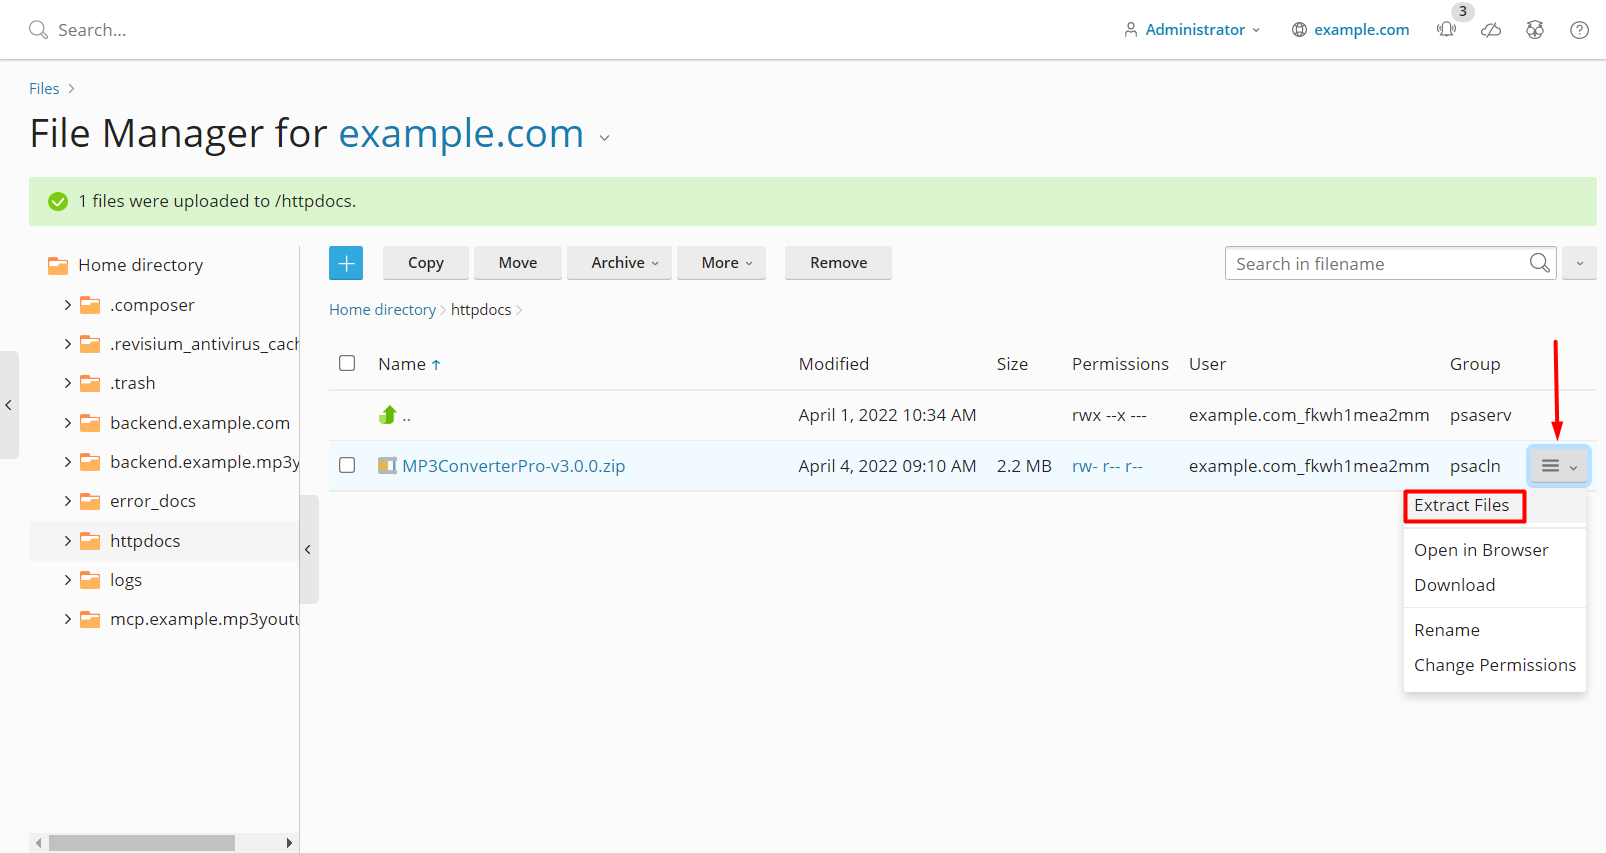
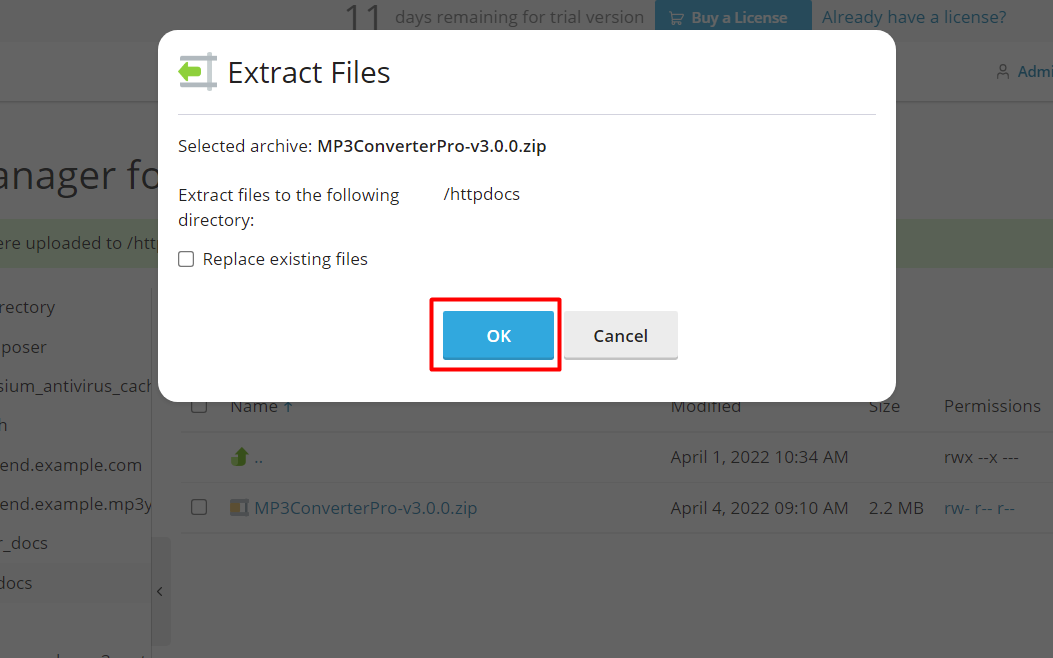
4) Click the hamburger icon/button that corresponds to the uploaded ZIP file, select "Extract Files" in the subsequent menu, and click OK in the ensuing popup
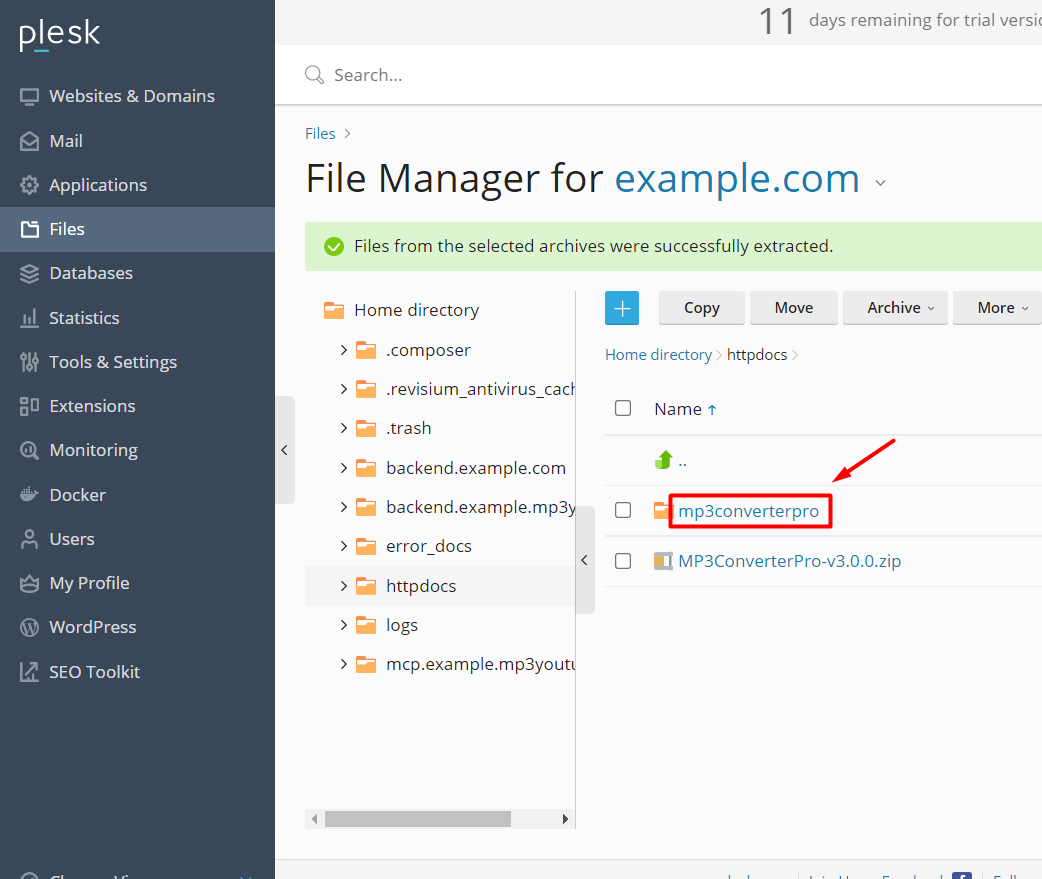
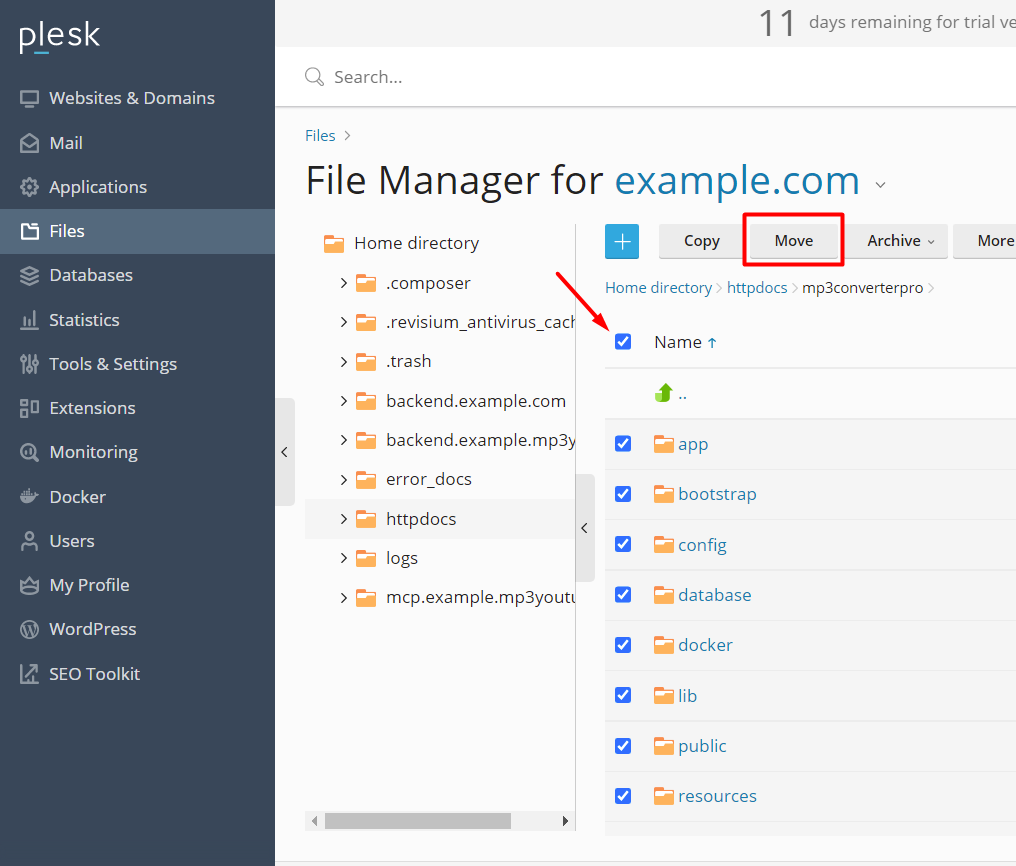
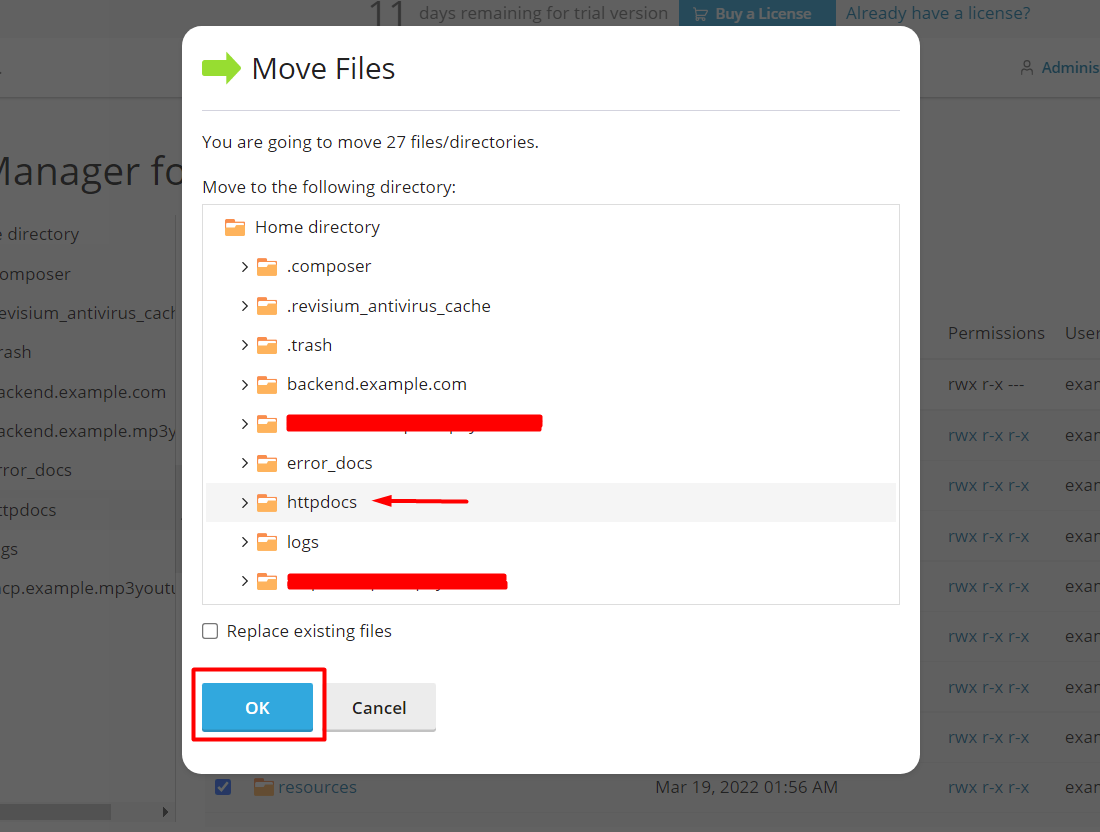
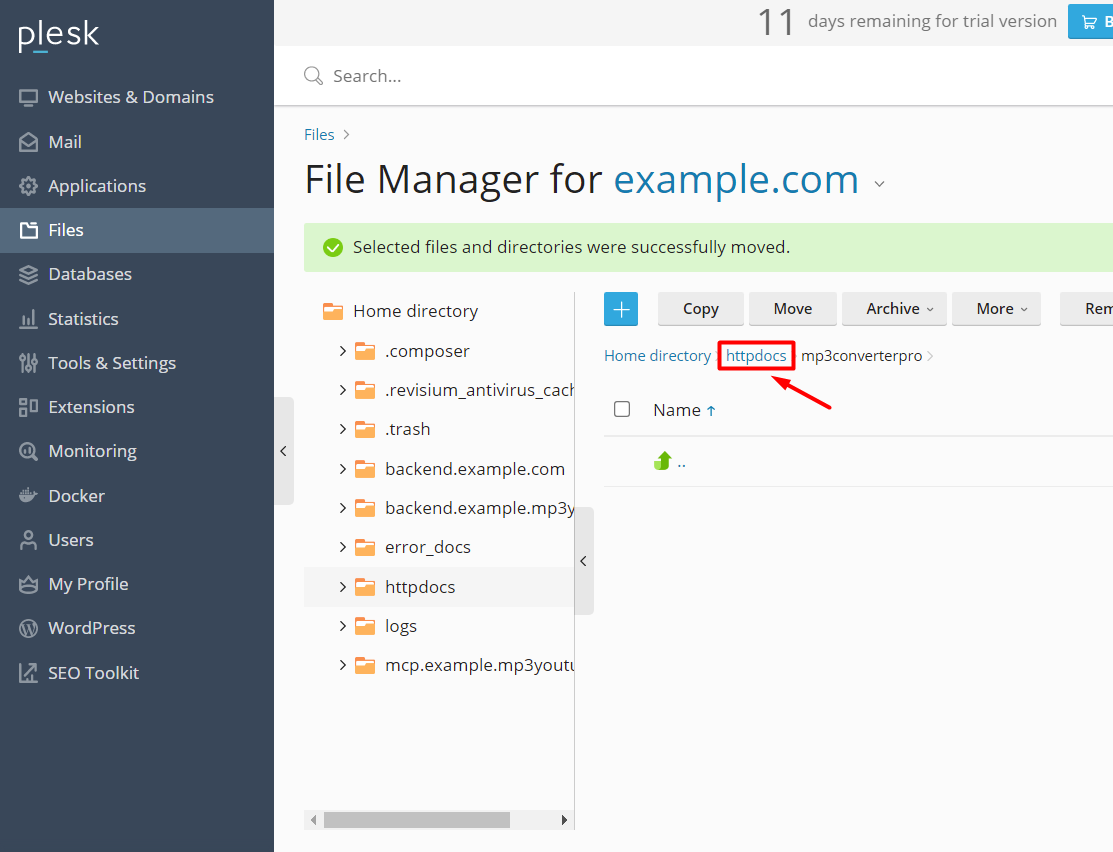
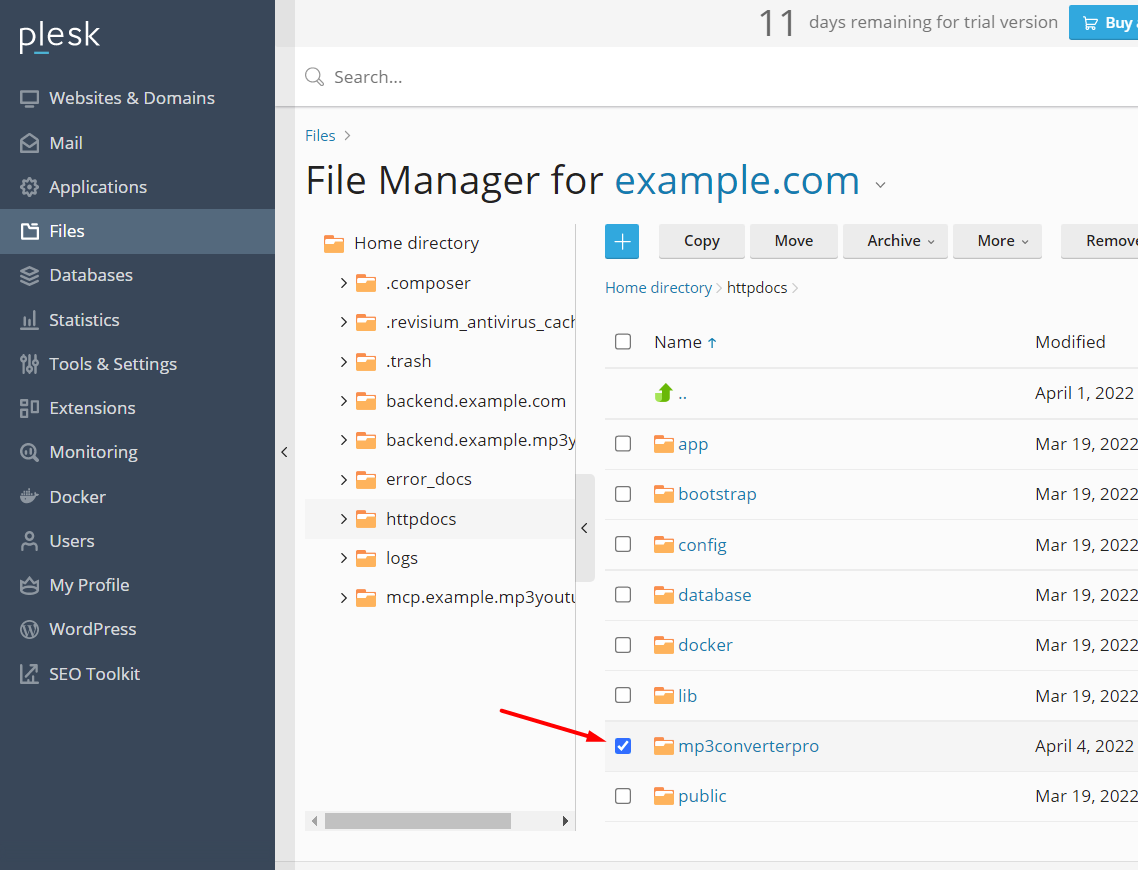
5) Click on the "mp3converterpro" folder to open it, select all files in the folder, and then move them to the parent directory
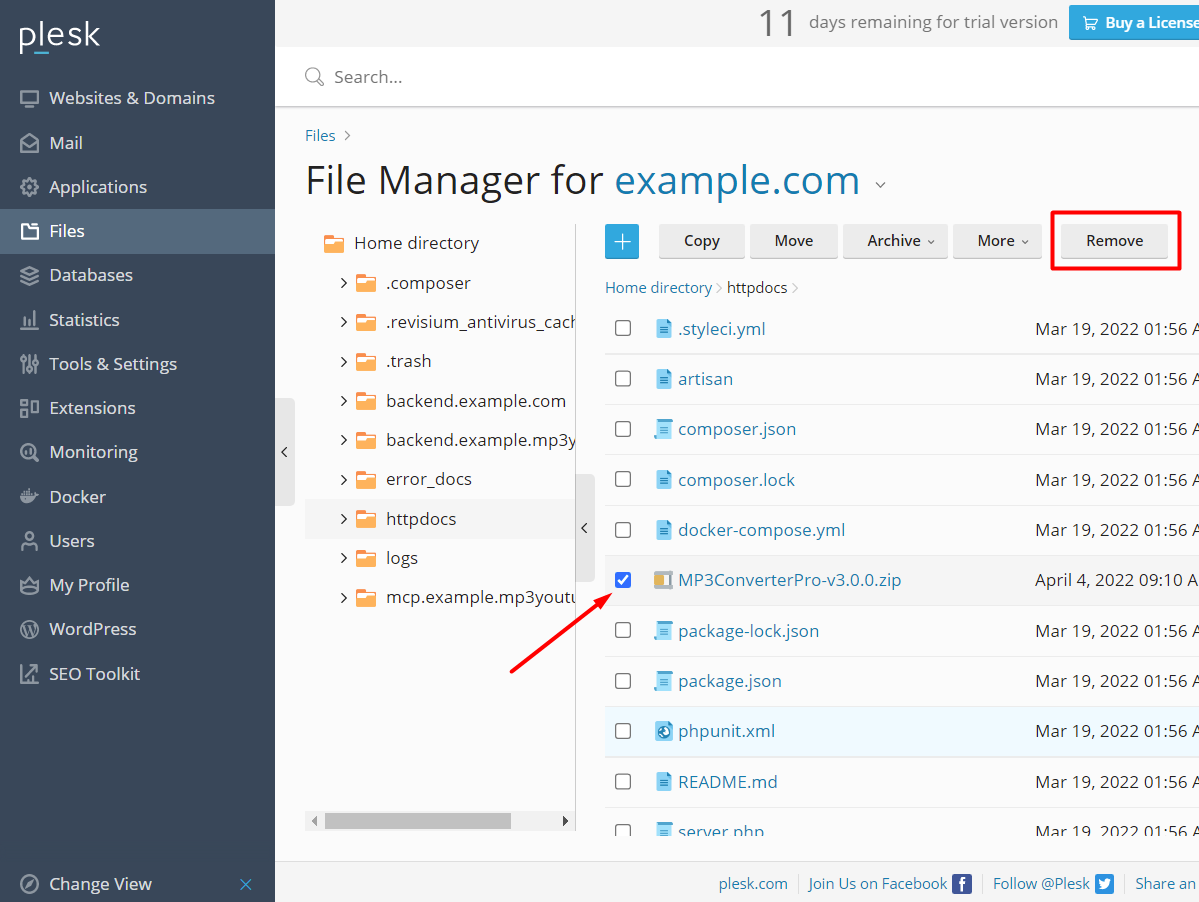
6) Click on and return to the parent directory, check the "mp3converterpro" folder and ZIP file, and delete them
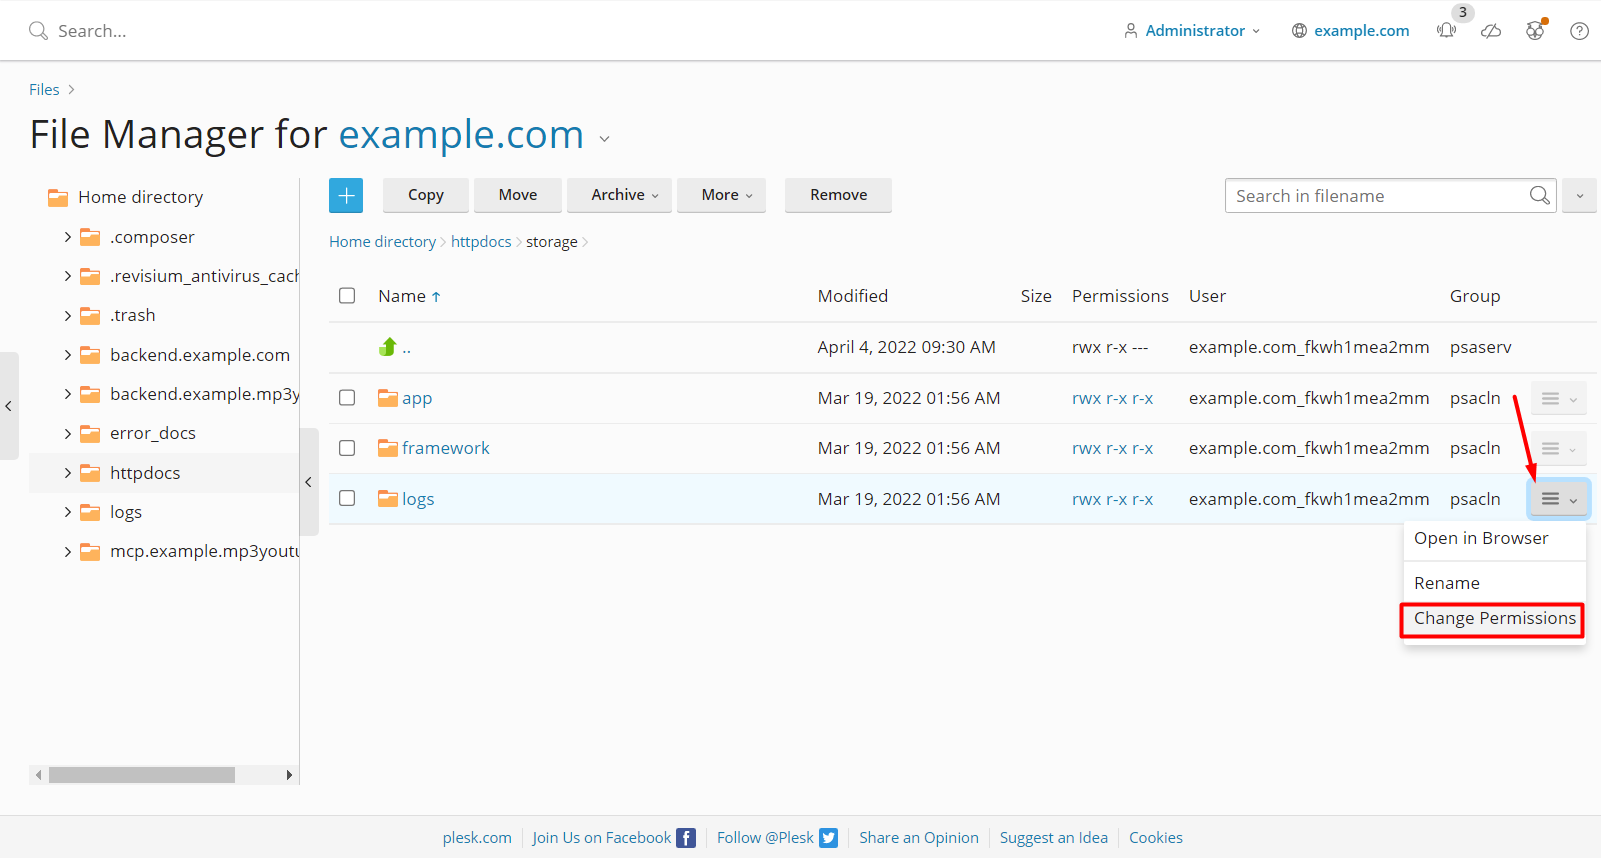
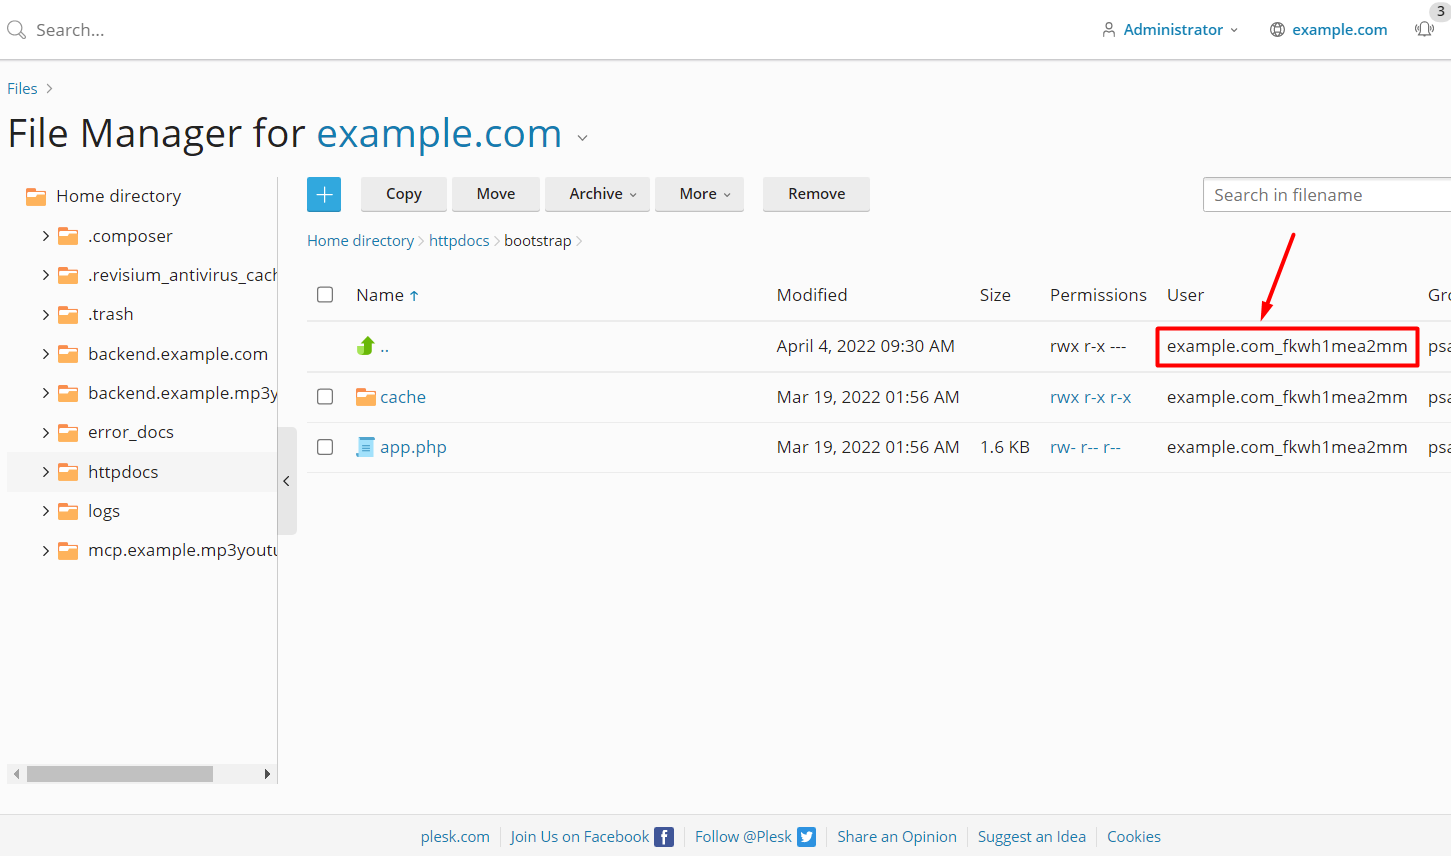
7) In File Manager, set permissions of BOTH "storage/logs" AND "bootstrap/cache" to full Write access, e.g.:

8) Copy the filesystem "User" name for later
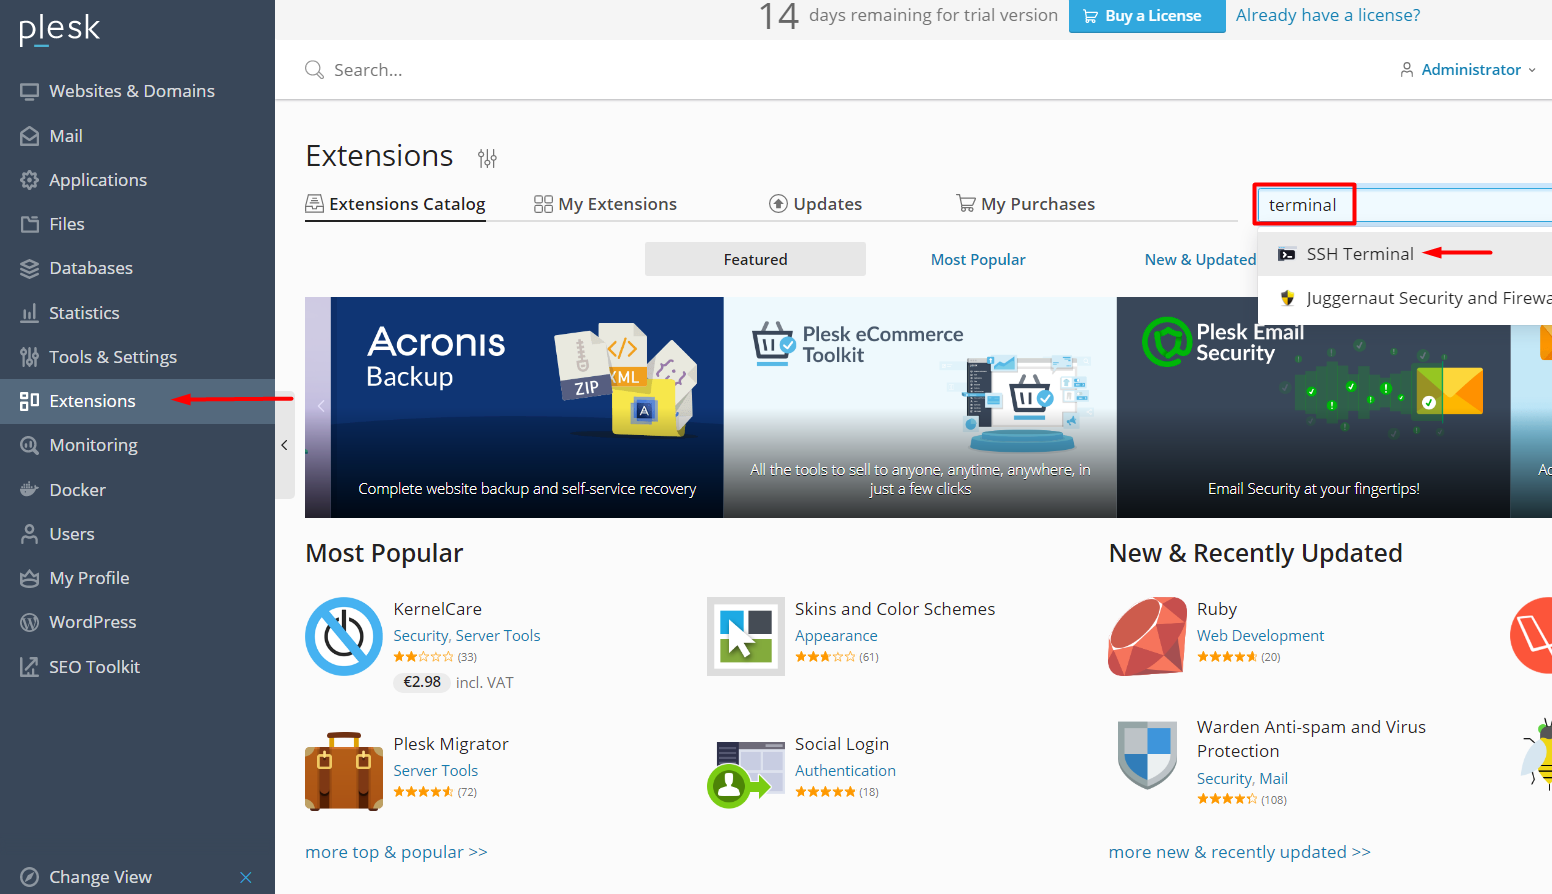
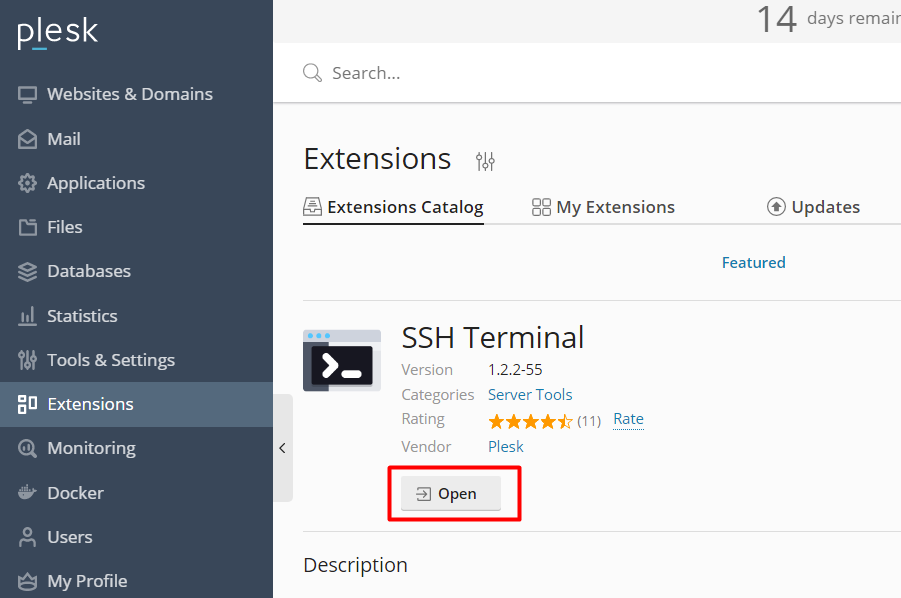
9) Click Extensions, search for "terminal", click on the "SSH Terminal" search suggestion, and click Open on the subsequent screen
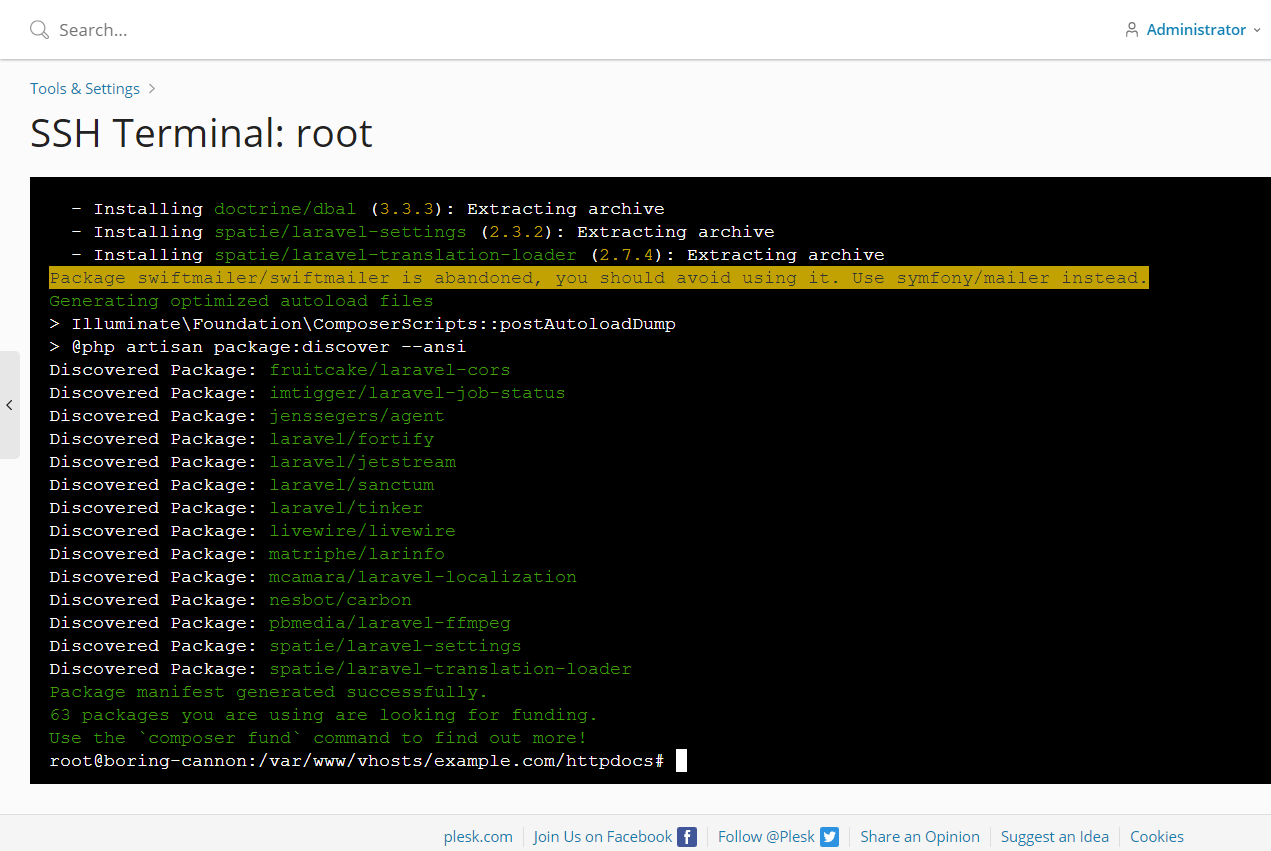
10) Go to the MP3 Converter Pro's root directory (copy and paste commands with Shift + Insert keys!)
cd /var/www/vhosts/example.com/httpdocs
11) Using the filesystem "User" name from the File Manager, install dependencies via Composer
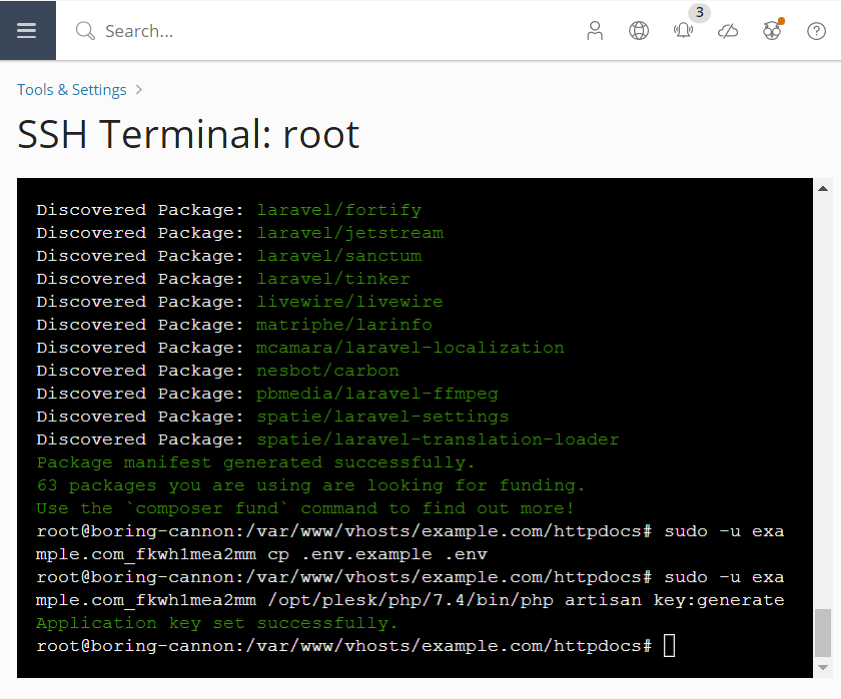
sudo -u example.com_fkwh1mea2mm /opt/plesk/php/7.4/bin/php /usr/lib/plesk-9.0/composer.phar install --no-dev
12) Using the filesystem "User" name from the File Manager, generate .env Config file
sudo -u example.com_fkwh1mea2mm cp .env.example .env
13) Generate unique APP Key
sudo -u example.com_fkwh1mea2mm /opt/plesk/php/7.4/bin/php artisan key:generate
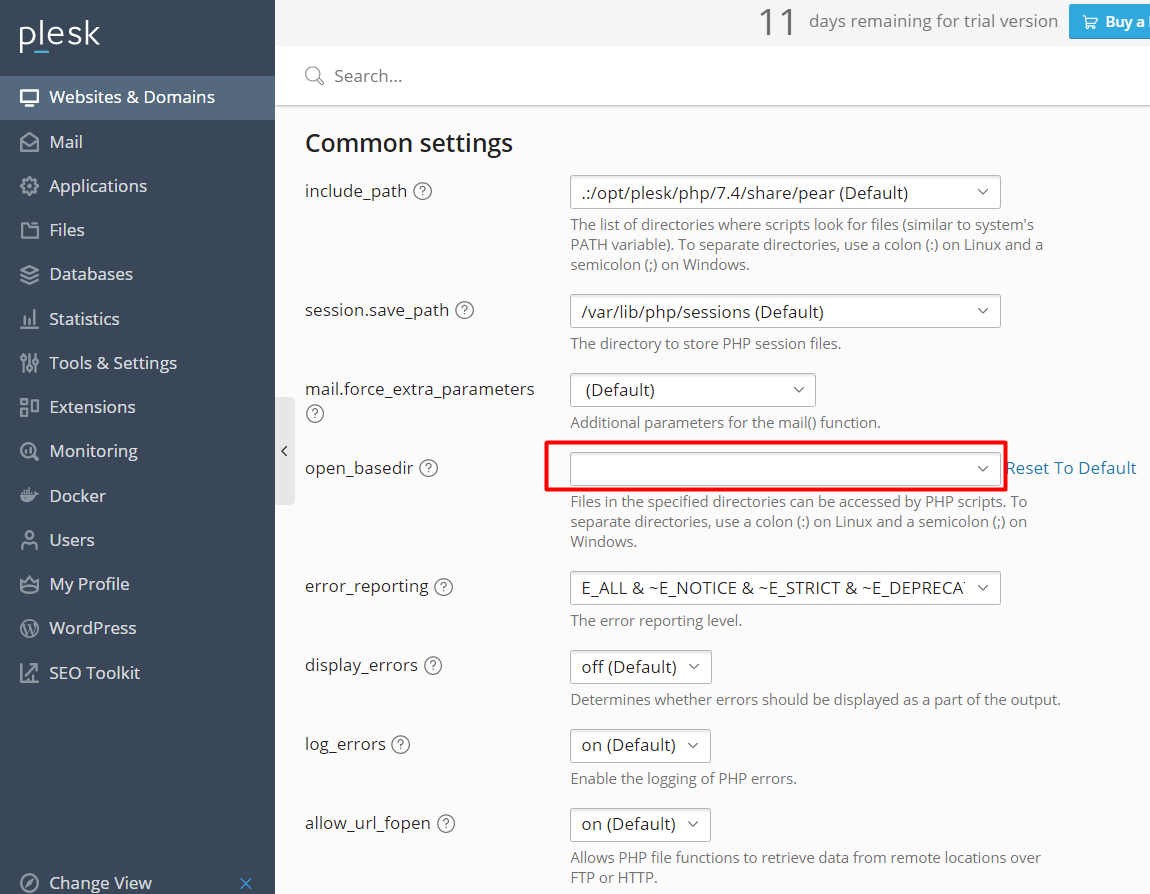
14) Click on Websites & Domains > example.com > PHP Settings, and set "open_basedir" to an empty value
15) Navigate to your Domain in a browser
https://YourDomain.com/installer
16) Enter your Database and Redis Login Details into the installer form and press Continue
17) On the next installer page, verify all tests (except the "Supervisor Horizon Worker running?" test -- see below) pass with "Yes", and then press "Migrate" on the Database section
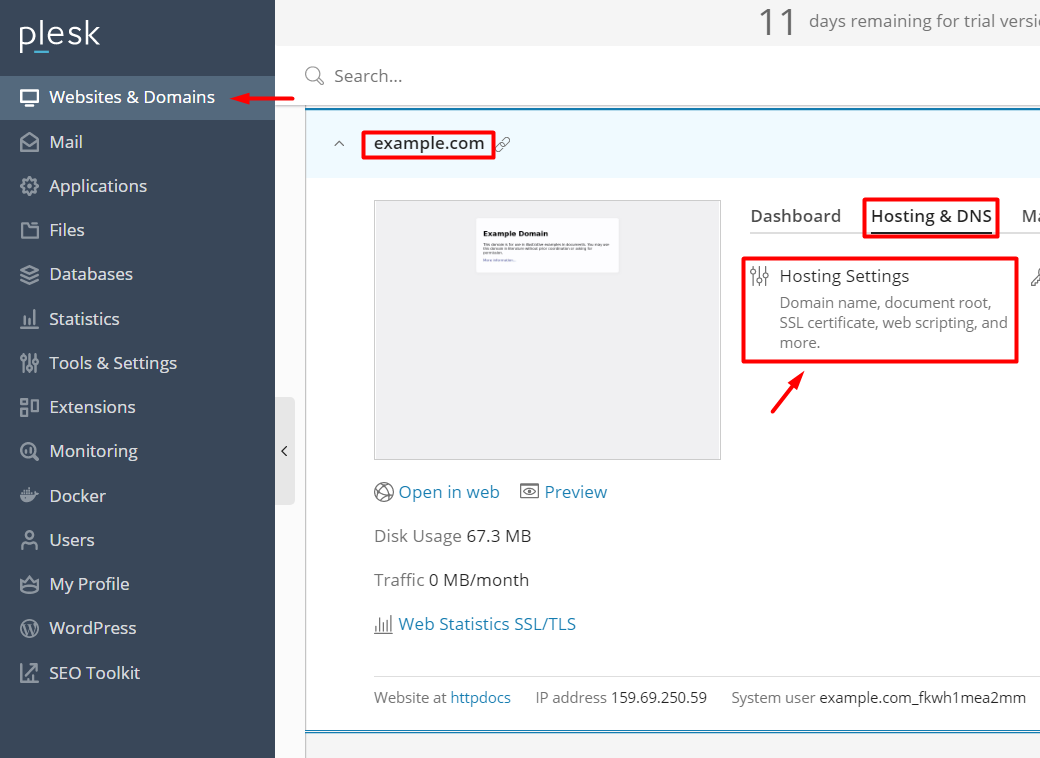
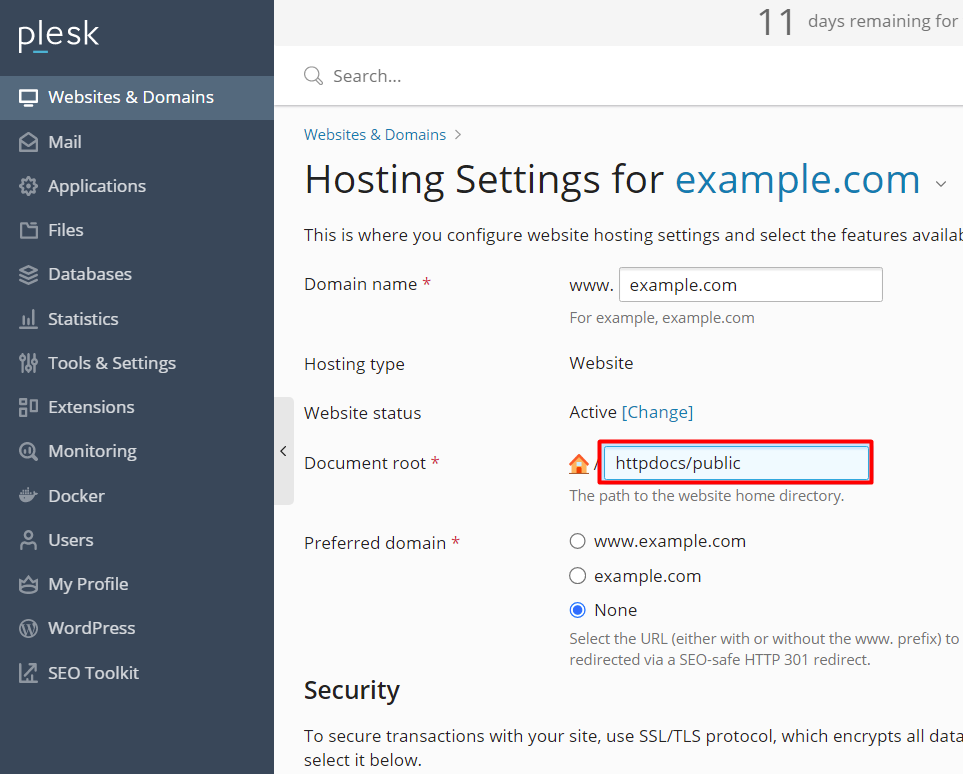
18) Click on Websites & Domains > example.com > Hosting & DNS > Hosting Settings, and update the Document root to "httpdocs/public"
19) Open the file "config/horizon.php", scroll down to Line 185, and edit the "maxProcesses" value
'production' => ['supervisor-1' => ['maxProcesses' => 10, // Number of CPU THREADS x 4 on Dedicated Servers, or Number of vCores x 2 on VPS/Cloud Servers'balanceMaxShift' => 1,
'balanceCooldown' => 3,],],
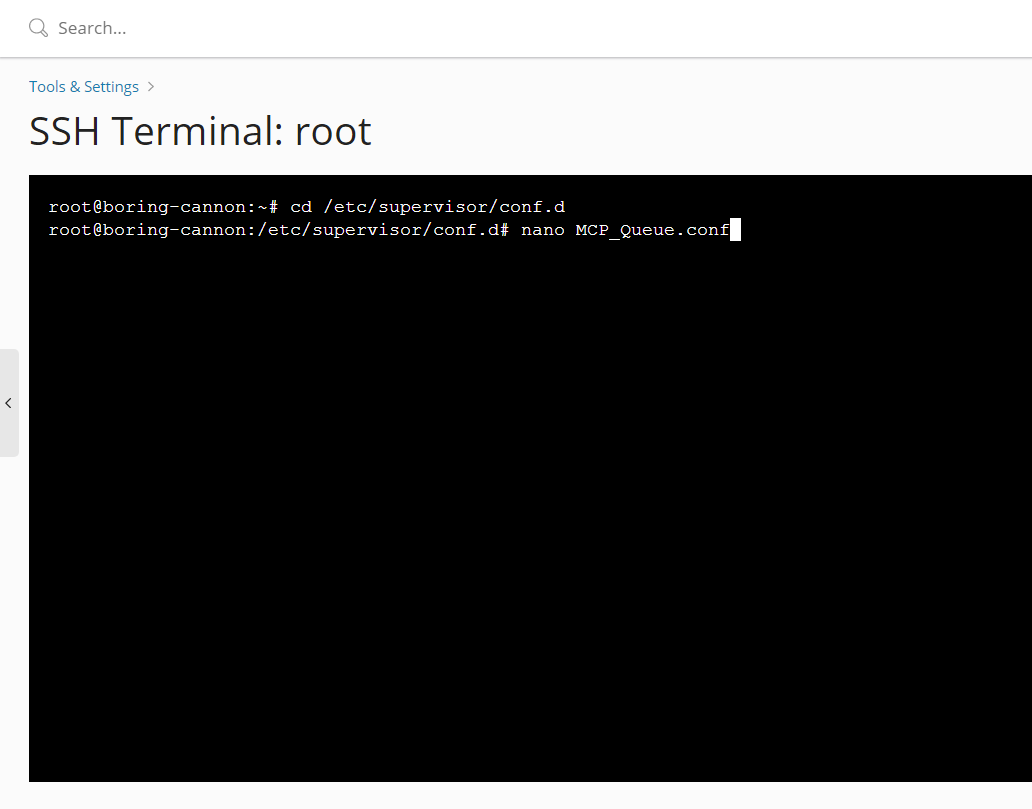
20) Return to the SSH Terminal, and go to Supervisor's configuration file directory (copy and paste commands with Shift + Insert keys!)
cd /etc/supervisor/conf.d
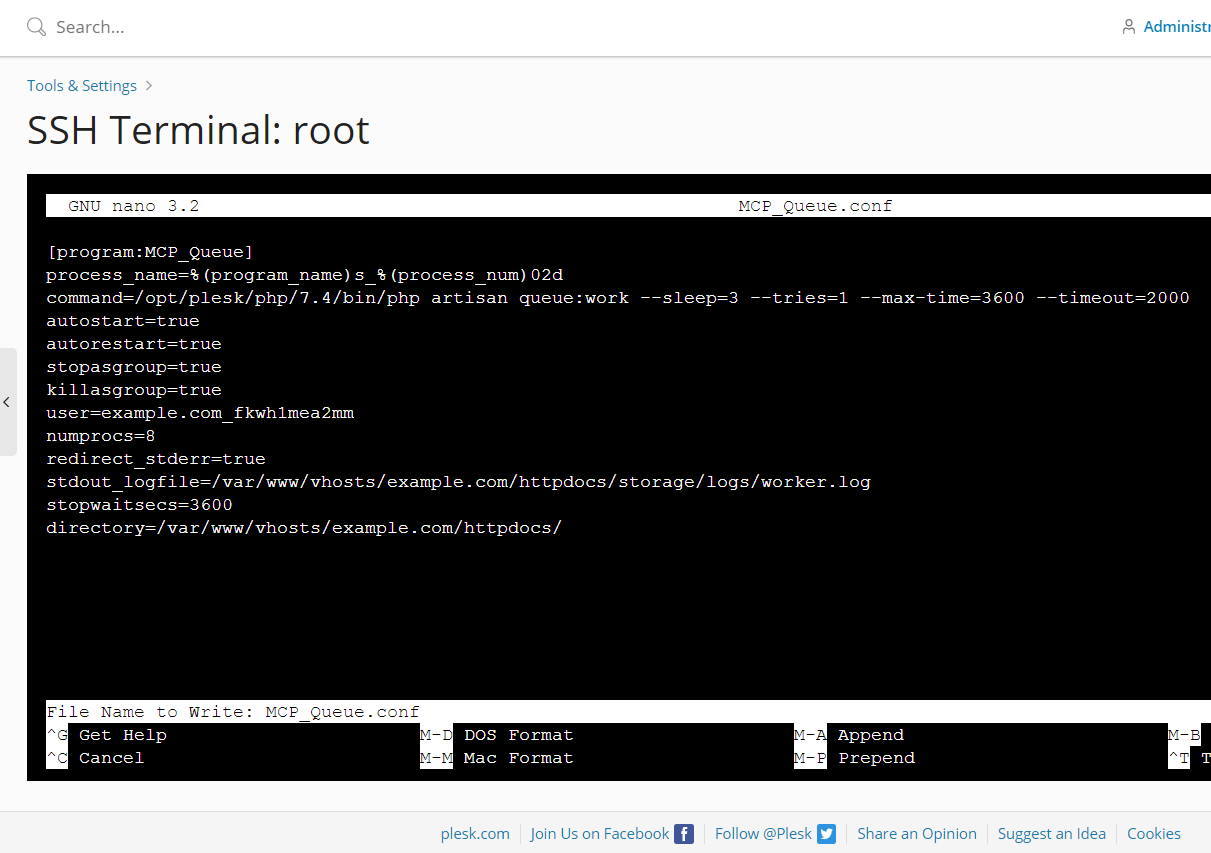
21) Create a new Supervisor config file using the SSH Terminal's "nano" text editor
nano MCP_Queue.conf
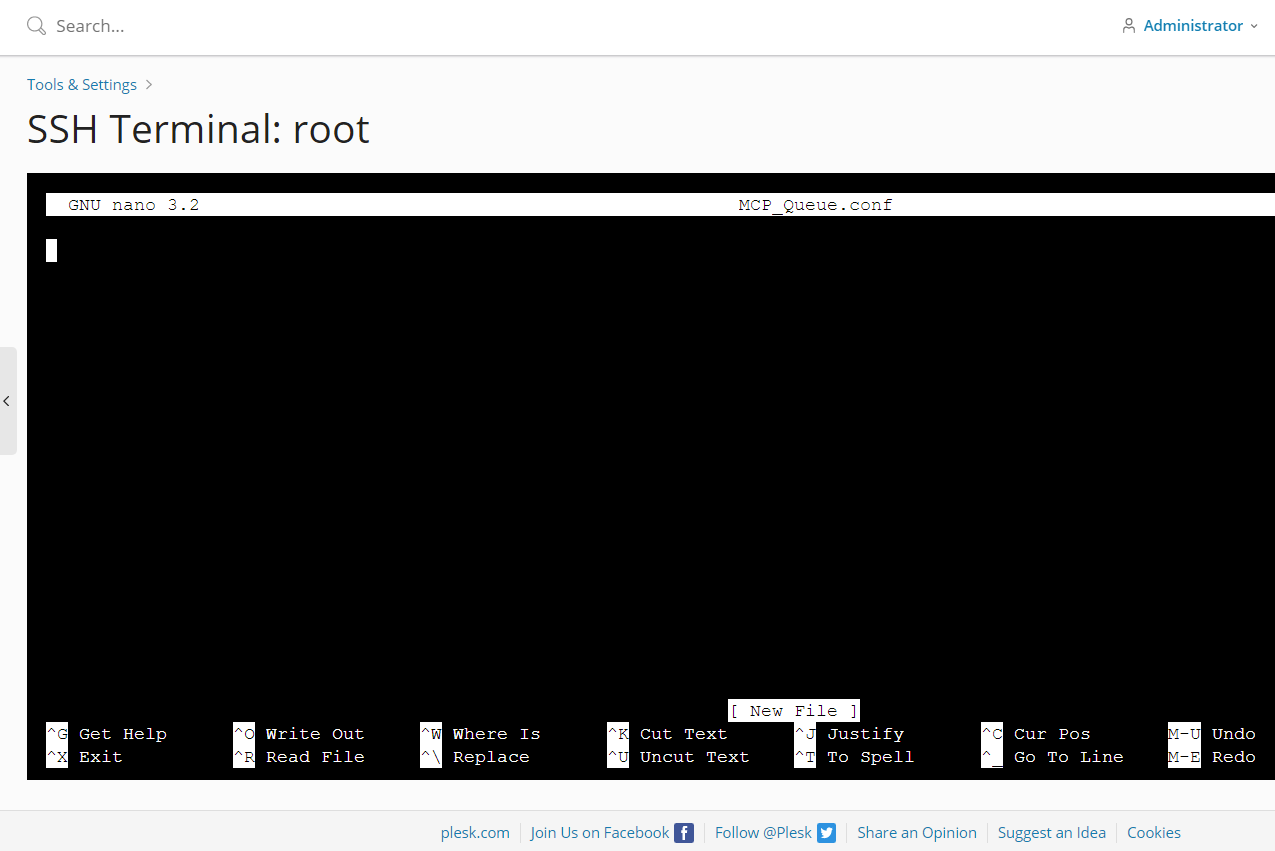
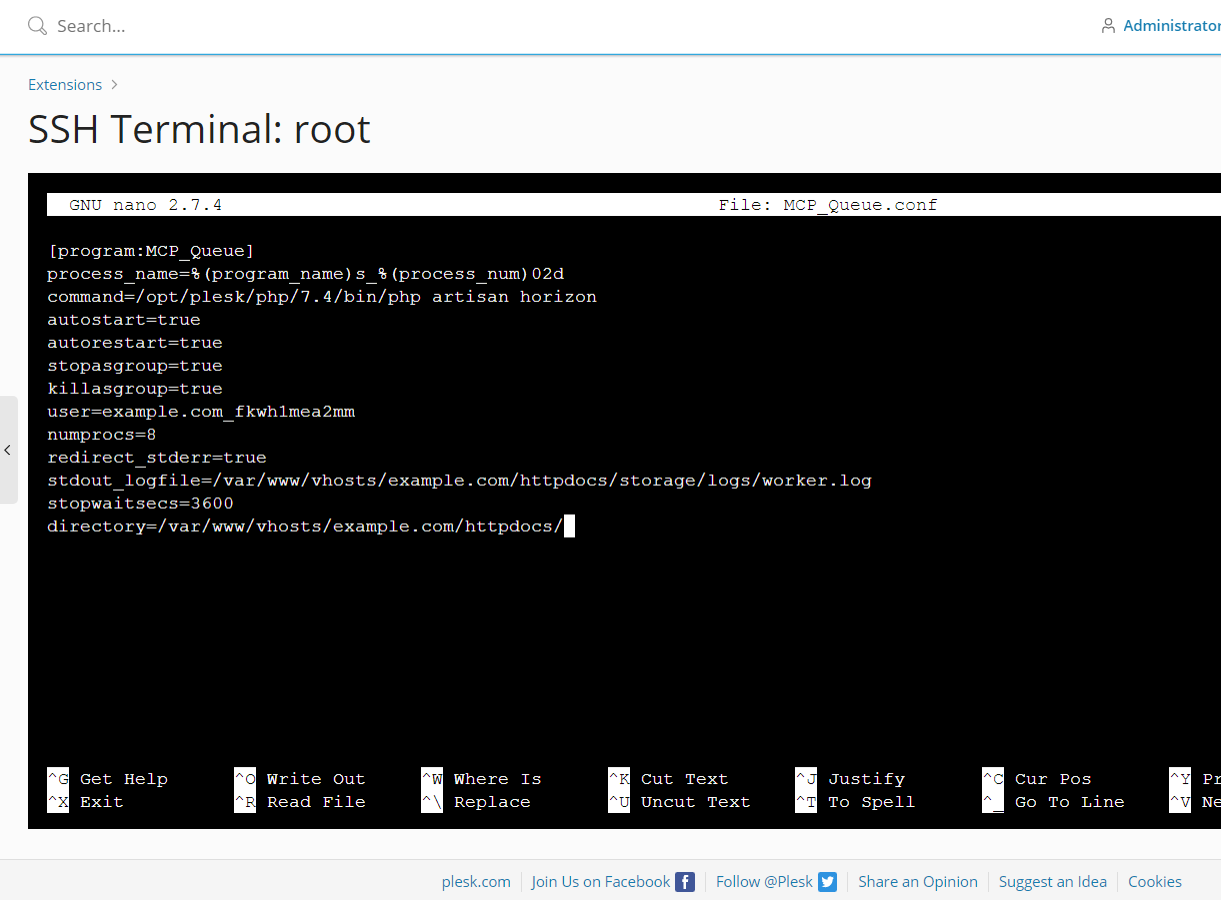
22) Edit the config file contents (below), and then paste the edited contents into the "nano" text editor (copy and paste with Shift + Insert keys!).
IMPORTANT: The number "8" in "numprocs=8" (below) should be replaced with the NUMBER OF CPU THREADS (on your server) x 4 (e.g., 2 x 4 = 8) !!
[program:MCP_Queue]
process_name=%(program_name)s_%(process_num)02d
command=/opt/plesk/php/7.4/bin/php artisan horizon
autostart=true
autorestart=true
stopasgroup=true
killasgroup=true
user=example.com_fkwh1mea2mm
numprocs=8
redirect_stderr=true
stdout_logfile=/var/www/vhosts/example.com/httpdocs/storage/logs/worker.log
stopwaitsecs=3600
directory=/var/www/vhosts/example.com/httpdocs/
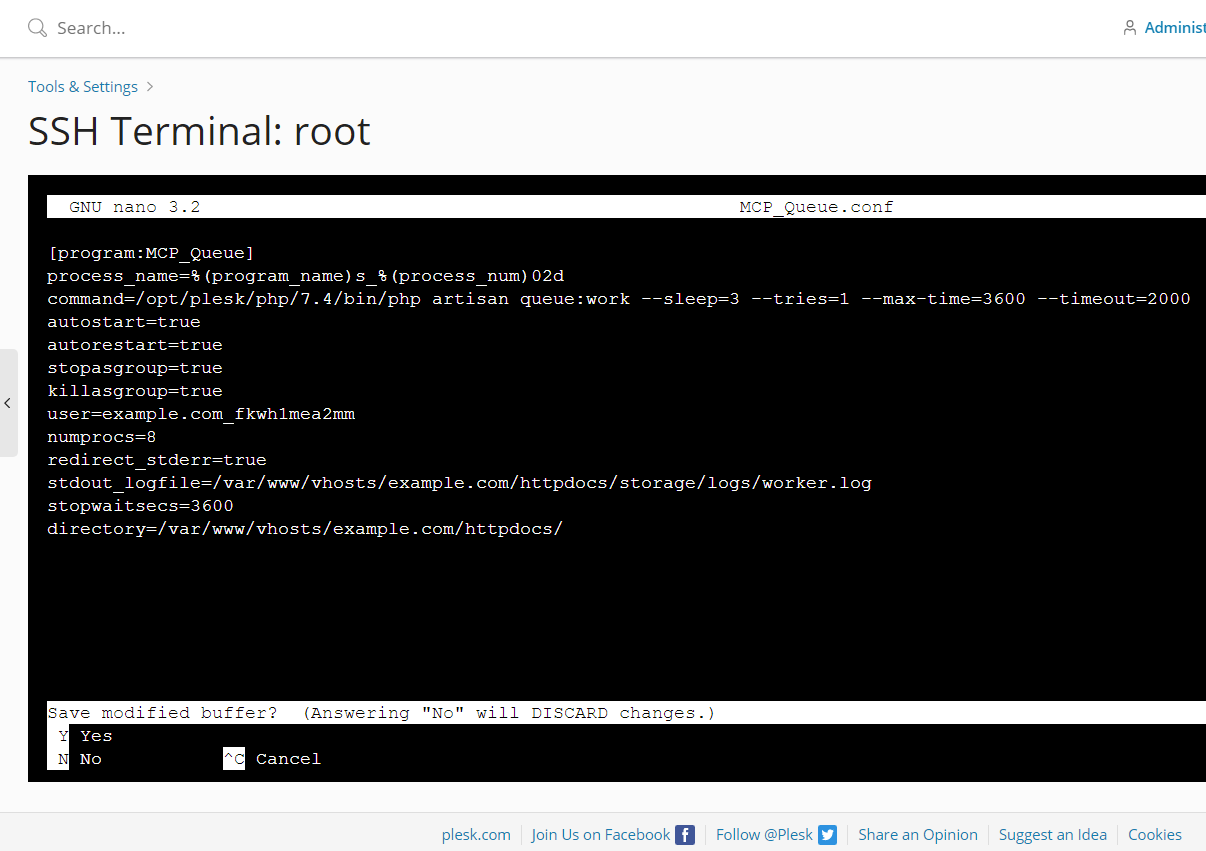
23) Type the following keyboard shortcuts into the "nano" text editor to save the file and exit the editor
Exit: Ctrl X

Save Modified Buffer?: Y

File Name to Write: Enter
24) Via 3 separate commands, "reread" your config file, "update" the Supervisor config, and "start" the Supervisor worker process
sudo supervisorctl reread
sudo supervisorctl update
sudo supervisorctl start MCP_Queue:*

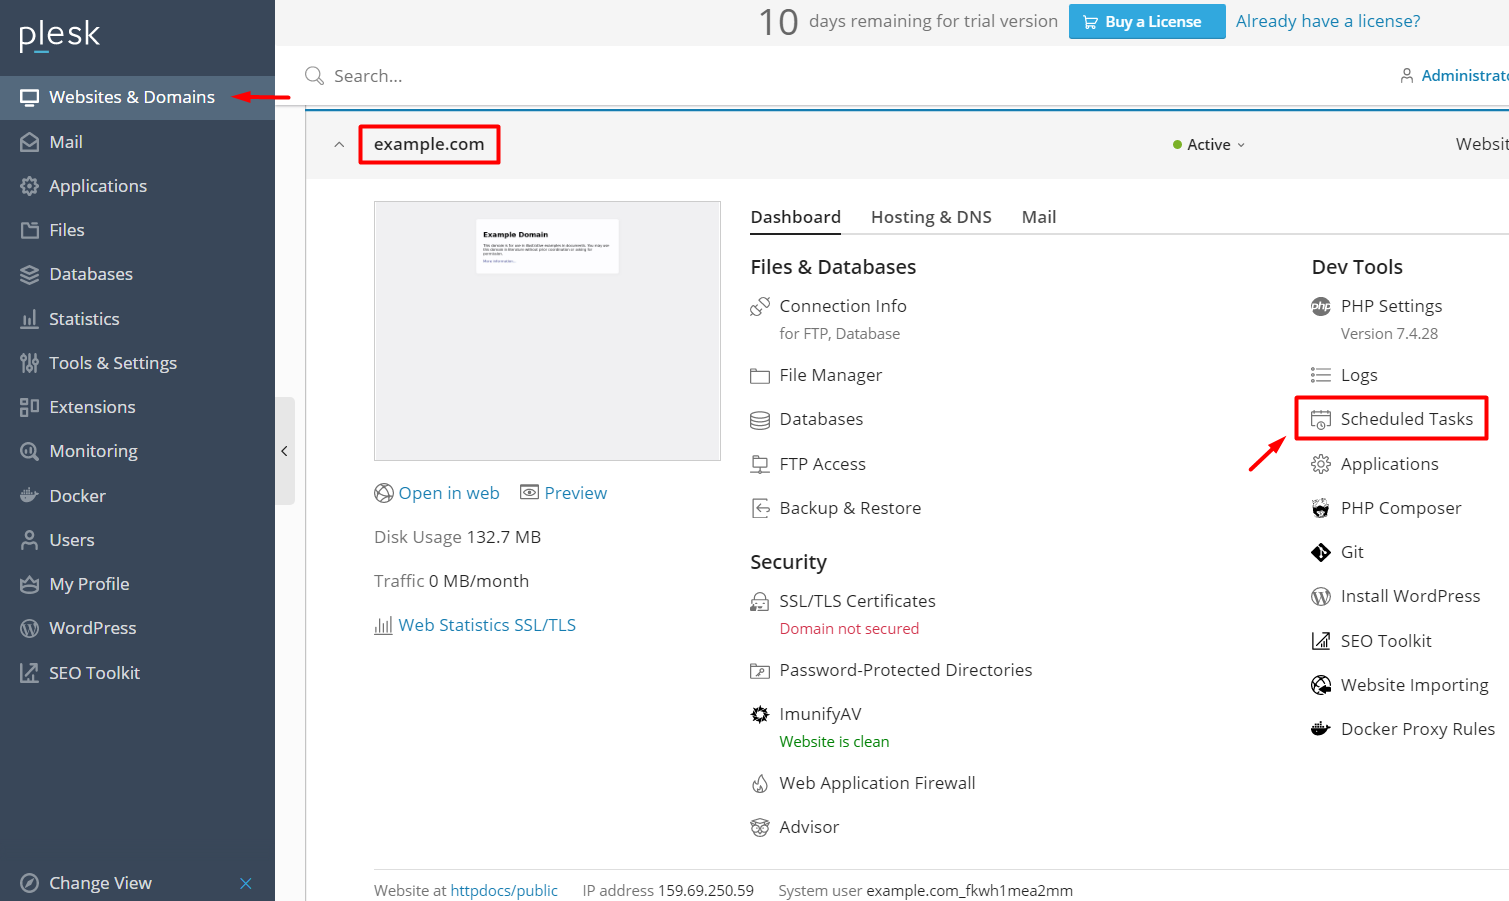
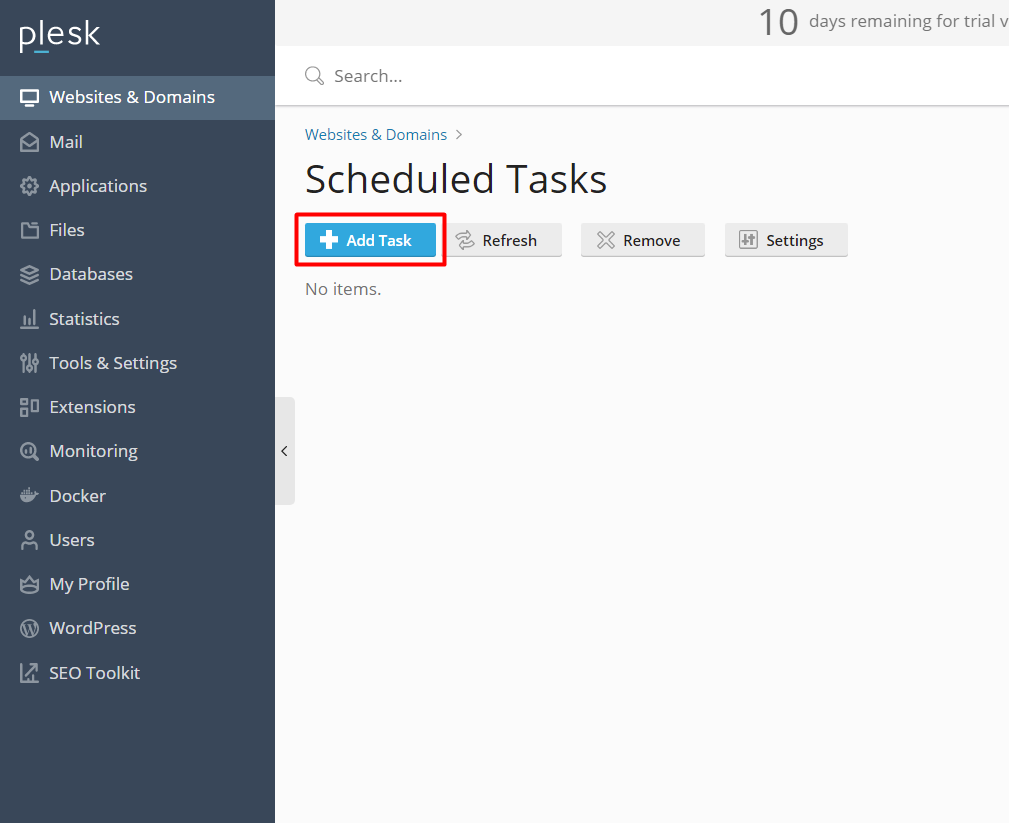
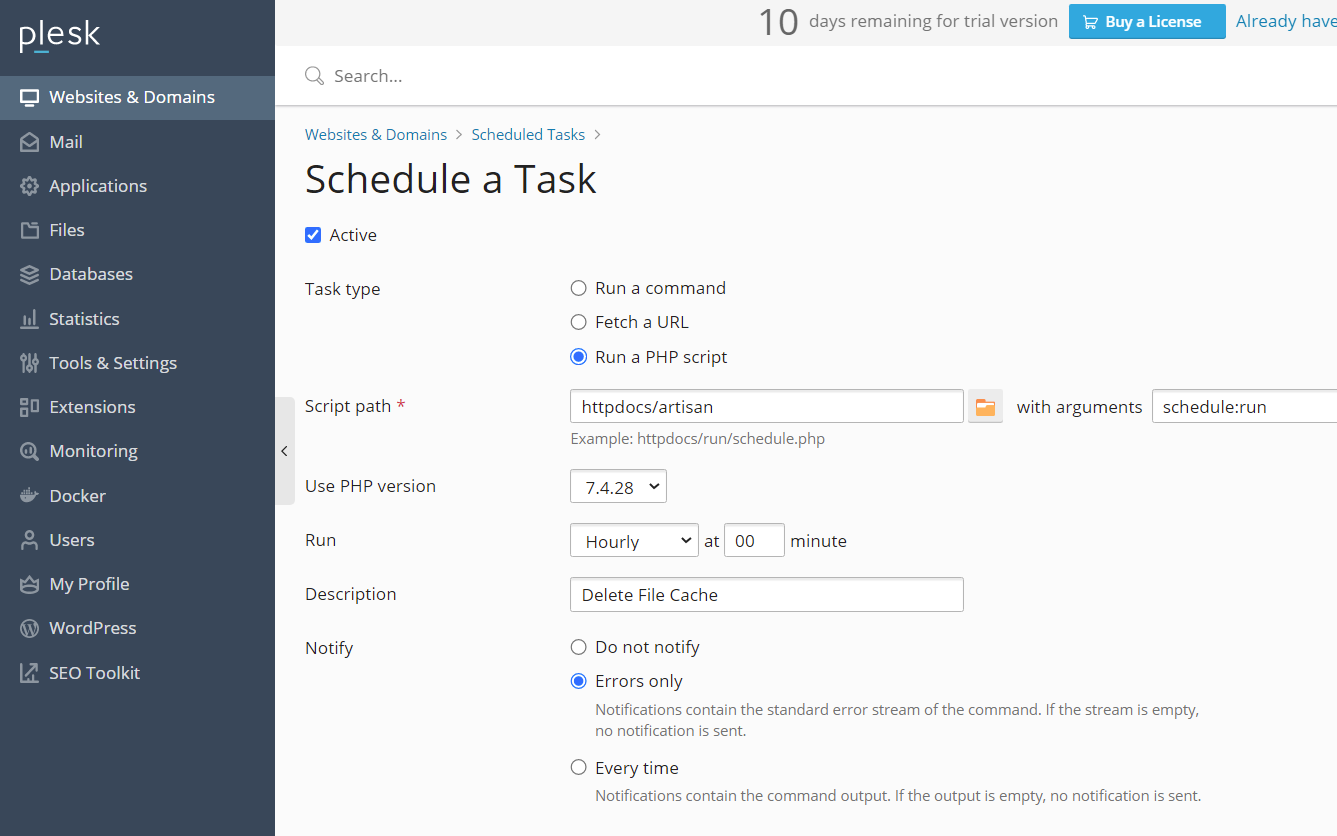
25) Click on Websites & Domains > example.com > Scheduled Tasks, click the Add Task button, and then set up a new task to delete old, cached files
Active: CheckedTask type: Run a PHP scriptScript path: httpdocs/artisanwith arguments: schedule:runUse PHP version: 7.4.28Run: Hourly at 00 minuteDescription: Delete File Cache
26) Refresh the 2nd installer page, verify that ALL tests now pass with "Yes", and then press "Complete Setup" (at the bottom of page)
https://YourDomain.com/installer/check
27) Navigate to the Admin Panel and log in with the following credentials:
http://yoursite.com/admin
Login: admin@admin
Password: 12345678
...Then click on the "admin" dropdown menu (at the top-right of page), select Profile, and update your Email and Password

28) In the Admin Panel, click on Settings, go to License Settings, add your Product License key, and then click the corresponding Save button. On the same page, go to Backend Settings, add your Backend URL and API key, and then click its corresponding Save button.

