Debian 9
Update Repo
apt-get update
Install Squid
apt-get install squidNote: IF you have Plesk installed, and IF you see this screen, then select "No"!
Install Apache-utils
apt-get install apache2-utils
Make a Backup of Original squid.conf
cp /etc/squid/squid.conf{,.orginal}
Delete old squid.conf
rm /etc/squid/squid.conf
Create a new empty squid.conf
nano /etc/squid/squid.conf
Debian 10 / Ubuntu
Update Repo
sudo apt update
Install Squid
sudo apt install squidNote: IF you have Plesk installed, and IF you see this screen, then select "No"!
Install Apache-utils
sudo apt install apache2-utils
Make a Backup of Original squid.conf
sudo cp /etc/squid/squid.conf{,.orginal}
Delete old squid.conf
sudo rm /etc/squid/squid.conf
Create a new empty squid.conf
sudo nano /etc/squid/squid.conf
CentOS
Update Repo
yum update
Install Squid
yum install squidNote: IF you have Plesk installed, and IF you see this screen, then select "No"!
Install Apache-utils
yum install httpd-tools
Make a Backup of Original squid.conf
cp /etc/squid/squid.conf{,.orginal}
Delete old squid.conf
rm /etc/squid/squid.conf
Create a new empty squid.conf
nano /etc/squid/squid.conf
Add this Config to your squid.conf (For Debian / Ubuntu)
http_port 0.0.0.0:3128

auth_param basic program /usr/lib/squid/basic_ncsa_auth /etc/squid/squid_passwd
auth_param basic realm proxy
acl authenticated proxy_auth REQUIRED

dns_nameservers 8.8.8.8 1.1.1.1
dns_v4_first on
http_access allow authenticated
http_access deny all

forwarded_for delete
Save the file with CTRL + O and exit nano Editor with CTRL + X
Add this Config to your squid.conf (CentOS)
http_port 0.0.0.0:3128

auth_param basic program /usr/lib64/squid/basic_ncsa_auth /etc/squid/squid_passwd
auth_param basic children 5
auth_param basic realm Squid Basic Authentication
auth_param basic credentialsttl 2 hours
auth_param basic realm proxy
acl authenticated proxy_auth REQUIRED

dns_nameservers 8.8.8.8 1.1.1.1
dns_v4_first on
http_access allow authenticated
http_access deny all

forwarded_for delete
Save the file with CTRL + O and exit nano Editor with CTRL + X
Create Squid Password file
Debian 9
touch /etc/squid/squid_passwd
Debian 10 / Ubuntu
sudo touch /etc/squid/squid_passwd
CentOS
touch /etc/squid/squid_passwd
Set File owner
Debian 9
chown proxy /etc/squid/squid_passwd
Debain 10 / Ubuntu
sudo chown proxy /etc/squid/squid_passwd
CentOS
chown squid: /etc/squid/squid_passwd
Generate User and Password
Debian 9
htpasswd /etc/squid/squid_passwd YourProxyUserName
Debain 10 / Ubuntu
sudo htpasswd /etc/squid/squid_passwd YourProxyUserName
CentOS
htpasswd -c /etc/squid/squid_passwd YourProxyUserName
Replace YourProxyUserName with any username you want.
After executing this command, your server will ask for a new password.
You can choose any password you want, but it must be ALPHANUMERIC (i.e., only letters/numbers, and NO special characters!).
Restart Squid
Debian 9
systemctl restart squid
Debain 10 / Ubuntu
sudo systemctl restart squid
CentOS
systemctl restart squid
Allow Squid in Firewall
Debian 9
ufw allow 'Squid'
(If you see an error "ufw not found" then skip it.)
Debian 10 / Ubuntu
sudo ufw allow 'Squid'
CentOS
firewall-cmd --permanent --add-service=squid

firewall-cmd --reload
Verify that your Server now behaves as a Proxy (IMPORTANT!!)
- Add the "Proxy SwitchyOmega" Browser Extension to the Chrome Browser
- Navigate to https://myip.is/ in your Browser
- You should see your local device's public IP and Hostname
- You should see your local device's public IP and Hostname
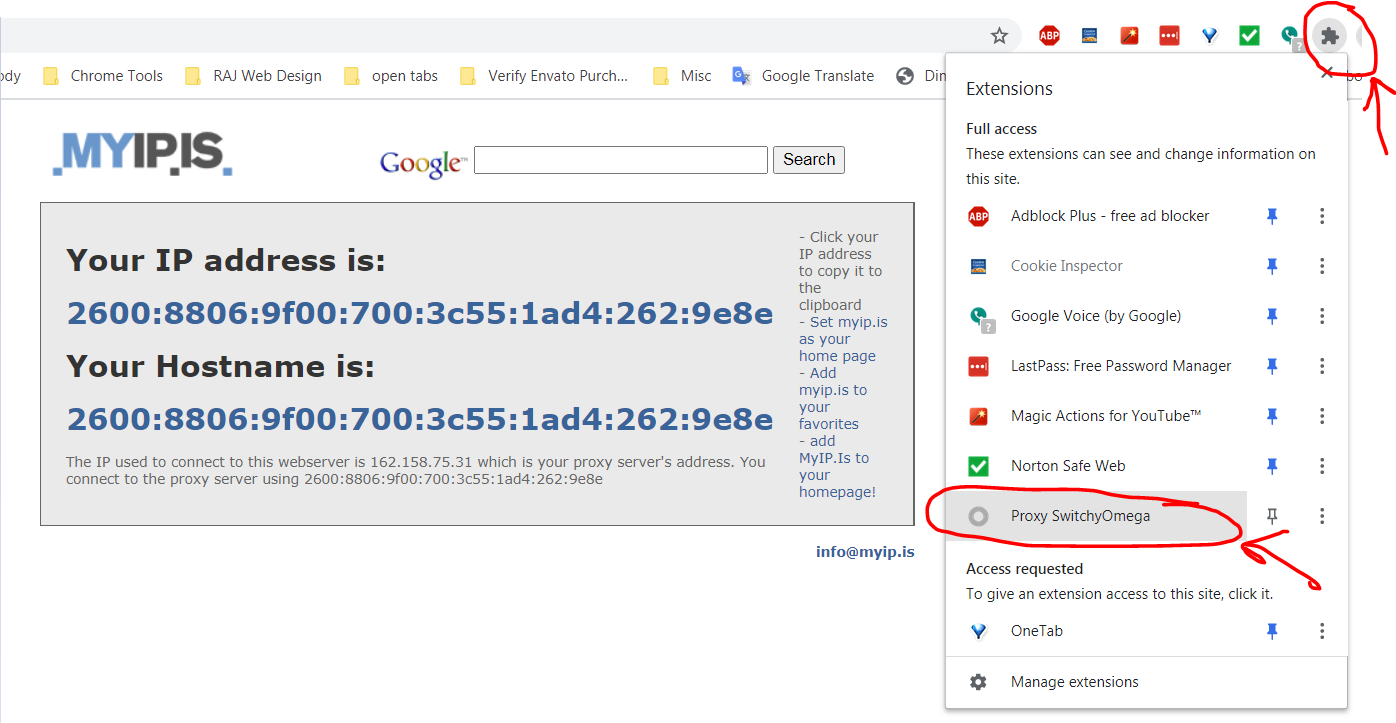
- Open the "Proxy SwitchyOmega" Browser Extension, as indicated:
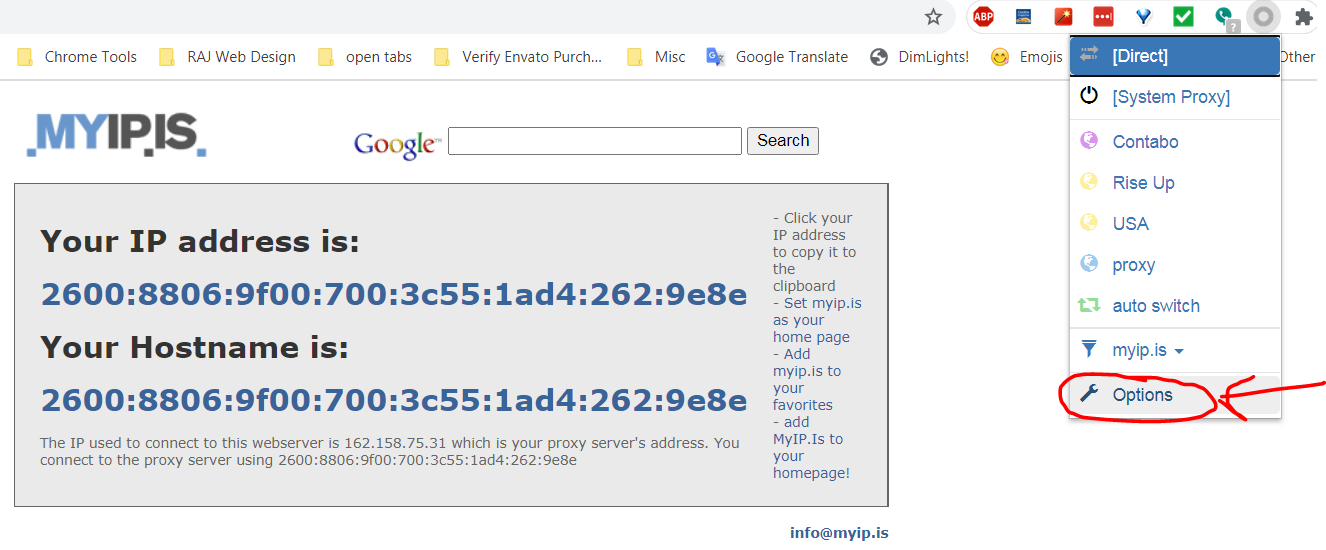
- Click on "Options" in the subsequent menu:
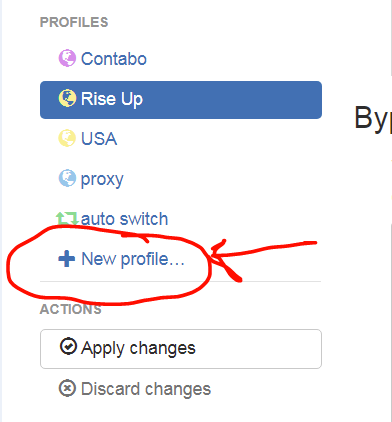
- After a new tab opens, click on "New profile":
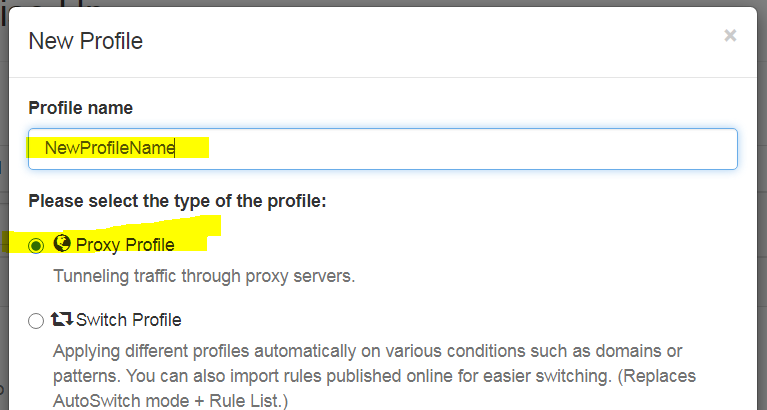
- Choose a Profile name and Select "Proxy Profile":
- Add your Proxy server details (as indicated), then click on the lock icon:

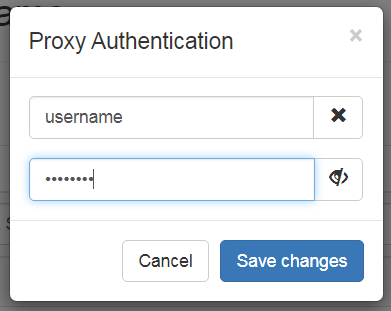
- Enter your Proxy username and password, and "Save changes":
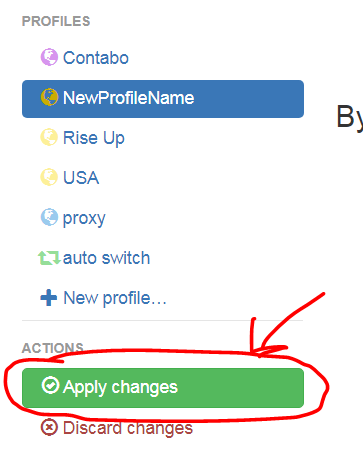
- Click the green "Apply changes" button:
- Navigate back to https://myip.is/ and open the "Proxy SwitchyOmega" Extension (again), as indicated:

- Select your New Profile name from the subsequent menu:
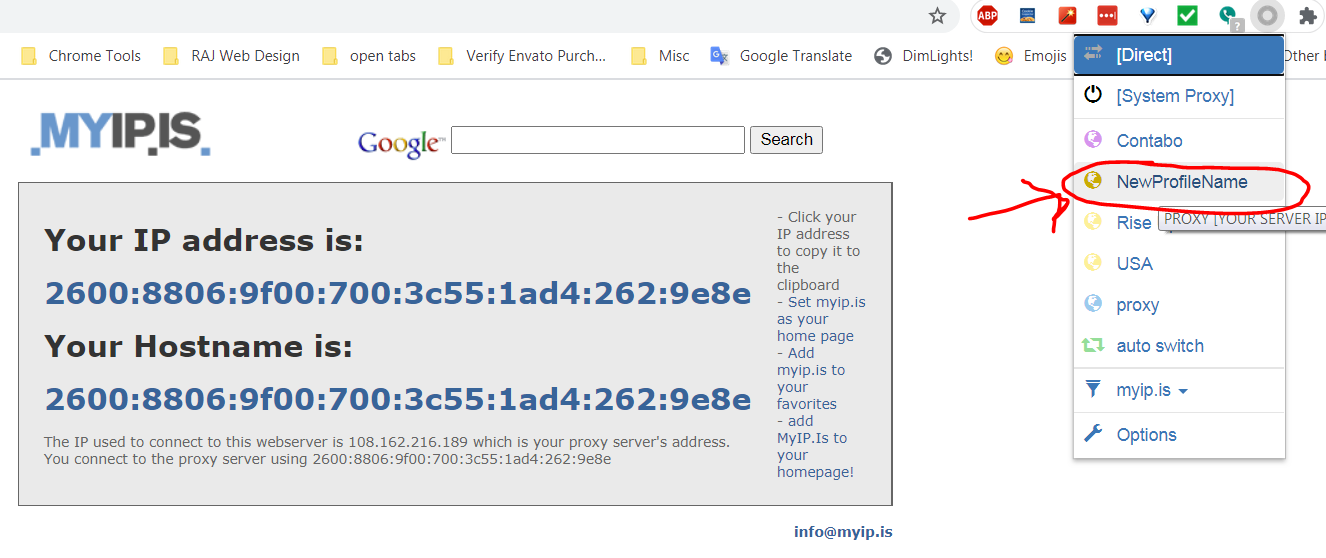
- https://myip.is/ should refresh and show your Server IP and Hostname. If it does, then your proxy is working!


